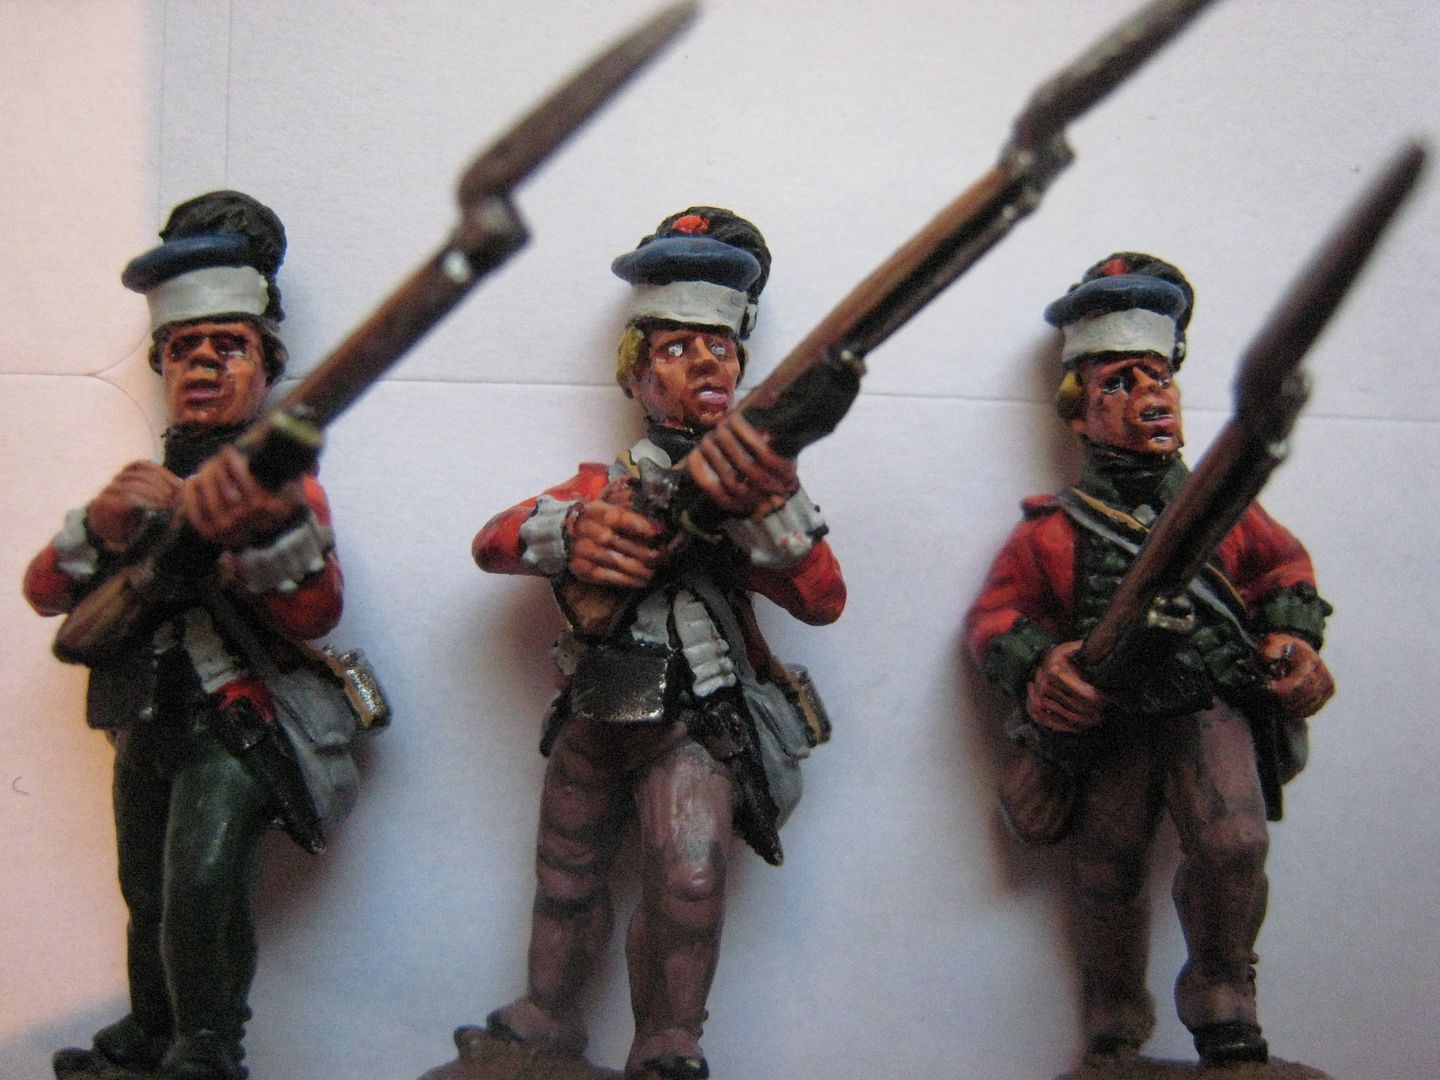
I've used various paints for flesh over the years. Currently, I'm using the Foundry "expert flesh" set, which is 6 colours. I only use 5 of those - I miss out the final highlight, 127F, as that really is too light I think. As I mentioned in my first post, I use 127A as the base coat and then wash everything with Winsor &Newton Peat Brown ink. This is quite a dark ink, and nothing like the "chestnut brown wash" which GW used to make and which I used a few years ago.

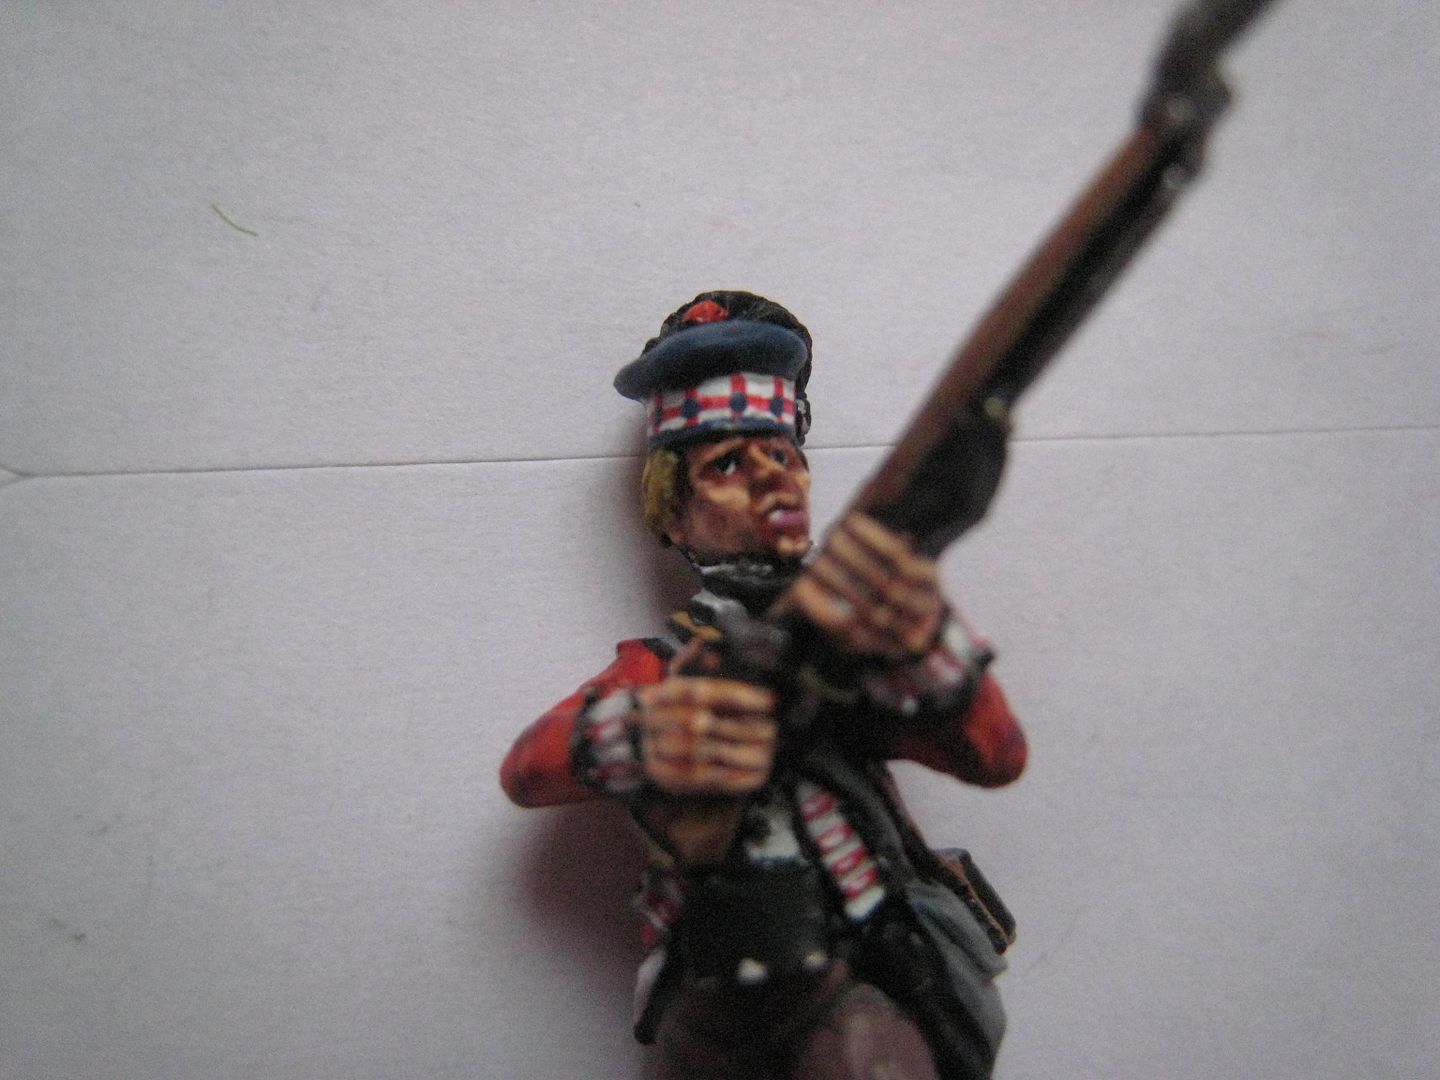
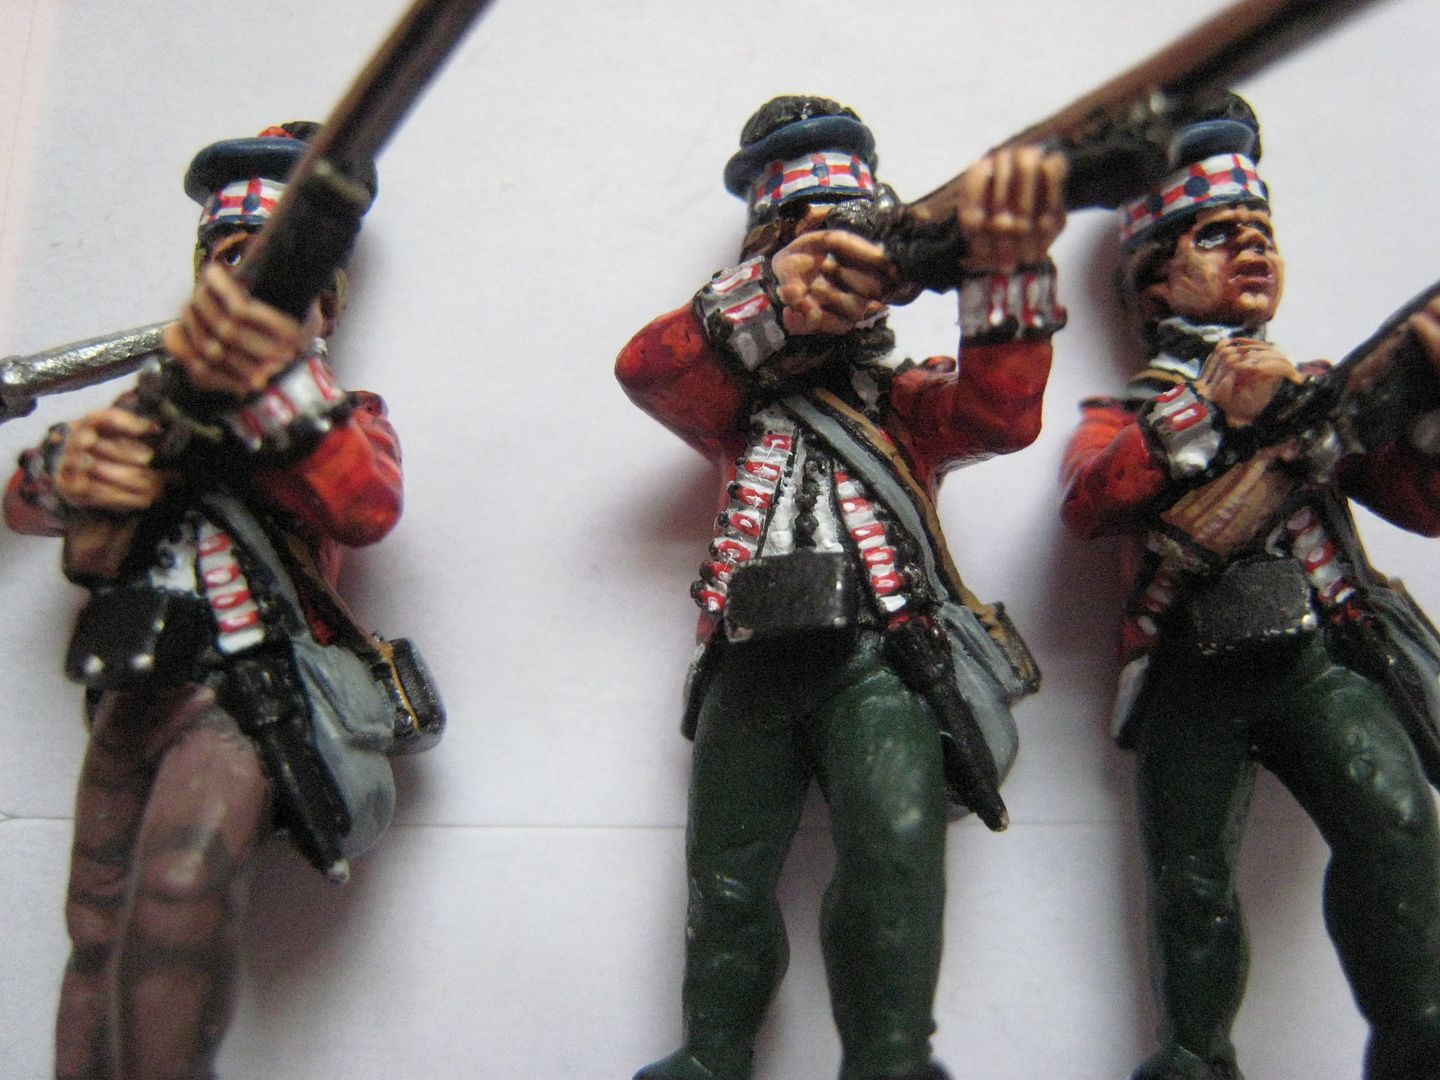
This ink pools in the eye sockets and this replaces any need to use black paint as a background for the eyeballs (I haven't used the "black eyesocket" method since about 2003, when my then girlfriend asked what type of mascara my figures were using...). I know many people don't paint eyes and/or think that to do so is completely out of scale. That's a perfectly valid stance and the scale point is probably true. But then think about the size of buttons - everyone usually paints them, but are they any larger than eyes? Like many painters , I can see myself not bothering with painting eyes any more as I get older. At the moment, however, I'm more than happy to give the eyes a go. Personally, I think if done effectively painted eyes can add a lot of character to figures and help draw groups of figures together. My own method is to paint a white oval slit and then add the smallest black pupils that I can. I try to leave a bit of white between the bottom of the iris and the eyeball- that is because I think it looks a bit more realistic and also because it helps give that "1,000 yards stare" look. The greater the space between the bottom of the iris and the eyeball the more the figure looks as if he's looking upwards - what I call the "where's that cannon ball going?" look. There's no denying that I find painting the eyes the hardest part of every figure. Sometimes I have to do them several times to get them right; and sometimes even after several attempts I give up and just put the "bad eye" figures in the back row. I find that if it's getting too tricky an easier solution is to place the irises in the corners of the eyes, as if the figure is looking in another direction (perhaps the "what's happening on our flank?" look). With firing-pose figures I always paint the right eye open and the left eye closed; that said I dimly recall reading somewhere that in the 18th century soldiers were trained to fire with both eyes open - perhaps a reader has further information on this.

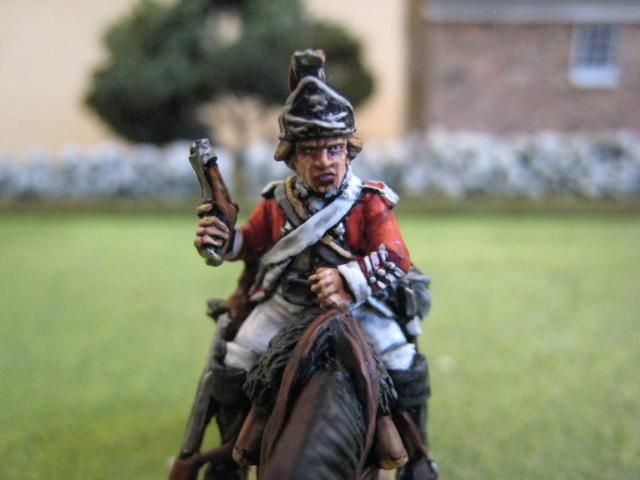
It's difficult to describe how I highlight the face itself, and there's right or wrong way, really. I use 127B to cover most of the face and then use progressively smaller amounts of 127C-E. I paint "eyebrows" with the B and C highlights - I find this is a good way of giving expression to faces. Slant the eyebrows down and you have a look of determination; arch them and you have surprise or worry. Upper lips are good for character too; incline one end a bit and you have a decent snarl. On the right is a face that I'm quite proud of, where I think the eyebrows, upper lip and eyes combined to give a real sense of character to this Perry British dragoon. Once I've finished with the Foundry 127 paints, I paint over any bits of the face that still have too much ink was he showing with Coat d'Arms "Dwarf Flesh", which is a darker flesh colour can tone down any of the highlights that look excessive.
Black lining is something I've done since I first read about it in a White Dwarf heavy metal article in the late 1980s. It always requires a fair amount of tidying up and so is time-intensive, but at the moment it's part of my style. I have seen many figures painted without any black lining that look absolutely terrific (an example that comes to mind is Melbourne war gamer John Chadderton's Eureka French Revolutionary Wars figures), so one day I may well drop it.

I've now done some final post-black lining highlighting and painted in the button-hole lace. Clearly trying to paint the exact lace would be daft, but I think it's good to paint an approximation of the lace to make it more interesting than a simple white line. What I do is look hard at the regimental lace until it blurs into a general impression (try the website here for replicas of regimental lace). This process invariably produces either a white line with a coloured blob in it or a coloured line with a white blob. In the case of the regiments here, the lace for the 71st is red with a white blob and for the 76th is green with a white blob. I looked again at pictures in Troiani, Mollo and the various Ospreys to see how the dicing on the bonnets works. What I hadn't noticed before is that all those pictures show a bit of blue underneath the dicing band, so I added this in very carefully after I'd finished the dicing.
Next will be final highlighting and the tartan trews. This afternoon I took a bit of time out to finish off the 7 Bunker Hill Virginians I had on the workbench, so the next post on these highlanders might have to wait until tomorrow.

3 comments:
The eyes I think are your painting trade mark, they really bring your figures to life. Looking forward to seeing these new figures finished and based, they look superb Giles.
Cheers,
Pat.
Wow! Given all those stages it amazes me even more how you get so many figures done!
As I don't use acrylics I have never been able to do washes: they just don't work with enamels!
Beautiful work Giles. I have given up doing the eyes on my guys.
Post a Comment