Showing posts with label Battles. Show all posts

Friday, 16 August 2013

Stono Ferry, 20 June 1779

Some more AWI at last!  On Wednesday I took a day off work and met up with "Eclaireur" and "Supercilius Maximus" (aka "Ronan the Librarian") at the former's north London pad to have a go at Stono Ferry.  I brought along an American militia brigade, the 71st Foot and a couple of bits and bobs and the rest of the figures used were from EC's own collection.  The table was dressed with EC's sumptious Realistic Modelling terrain and some nifty home-made abatis (fashioned from those diy plastic model trees that you add clumps of foliage to) and redoubts made using Renedra gabions.  For rules we of course used EC's own "British Grenadier!".

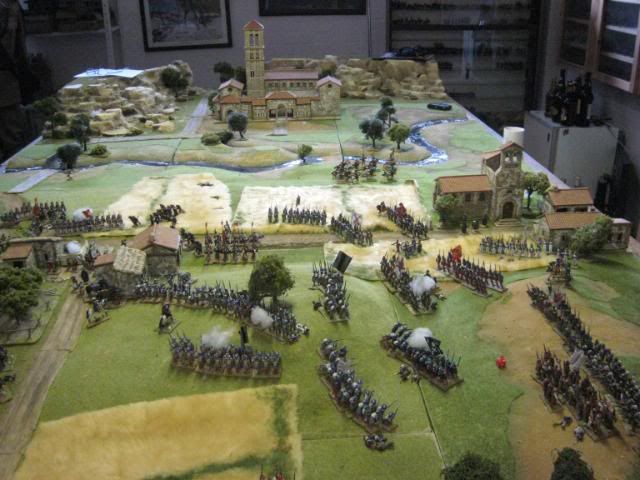
Stono Ferry is not one of the AWI "biggies" and probably isn't that well known a battle.  It's one of those rare engagements that involves an American attack on a British defensive position.  After his attempt to invest Charleston in April 1779, Brigadier General Augustine Prévost decided to withdraw his British force back to its base at Savannah.  Stono Ferry was a crossing point at which the British built a supply camp.  A small force under the command of Lieutenant Colonel John Maitland of the 71st Foot was tasked with guarding the ferry. Brigadier General Benjamin Lincoln, commanding the American Southern Army, saw an opportunity to attack the British position.

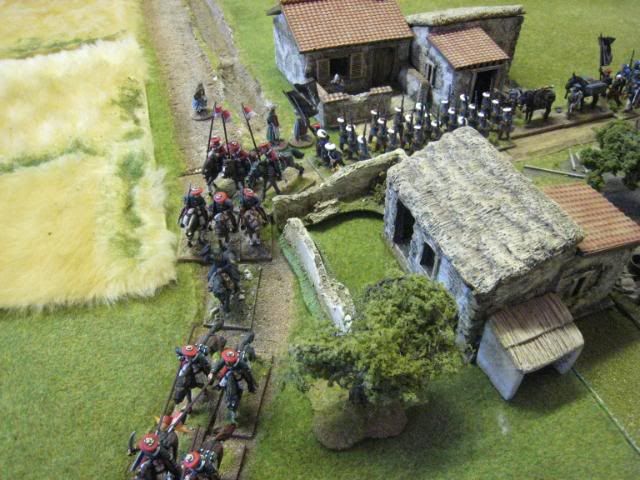
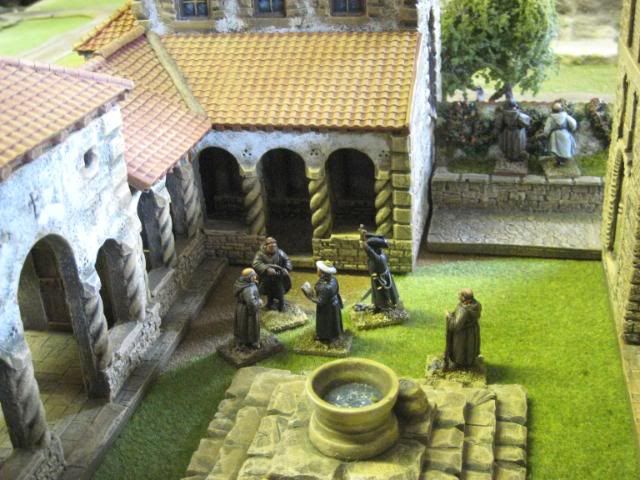
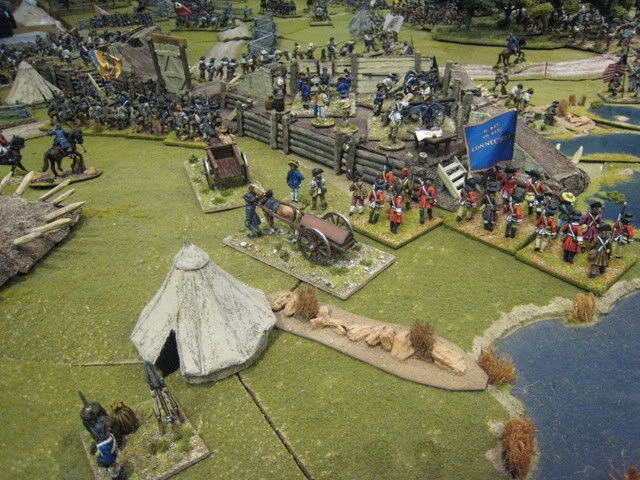
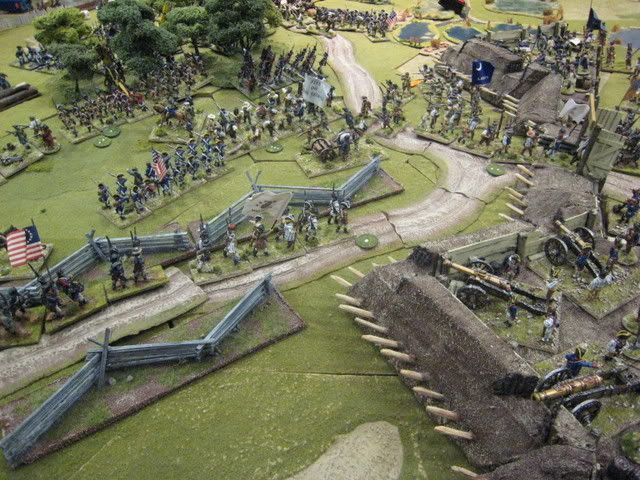
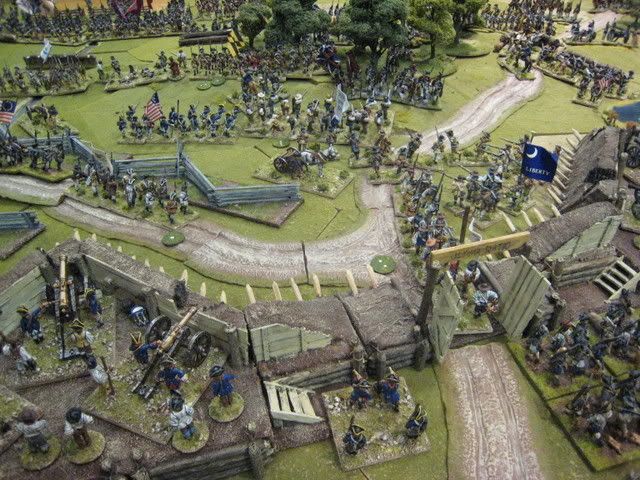
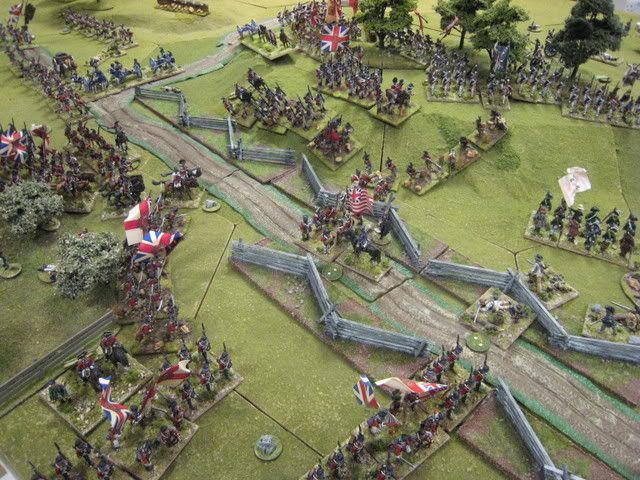
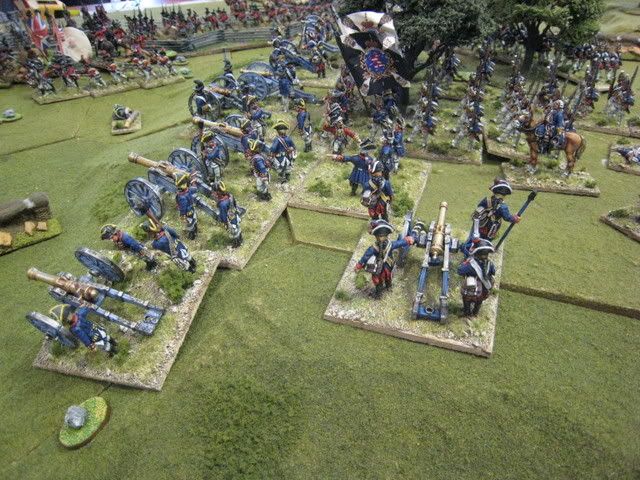
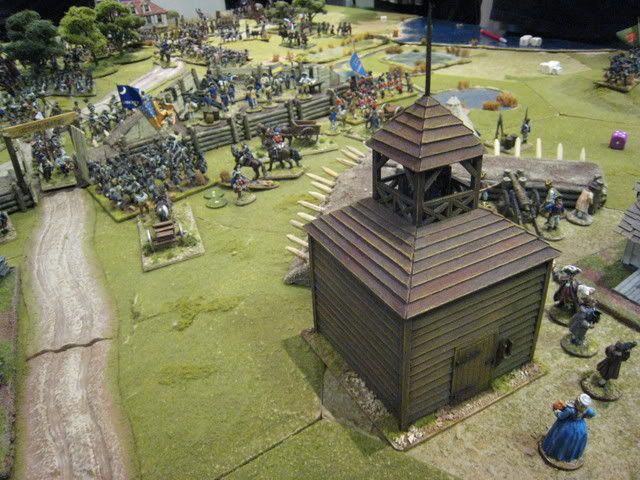
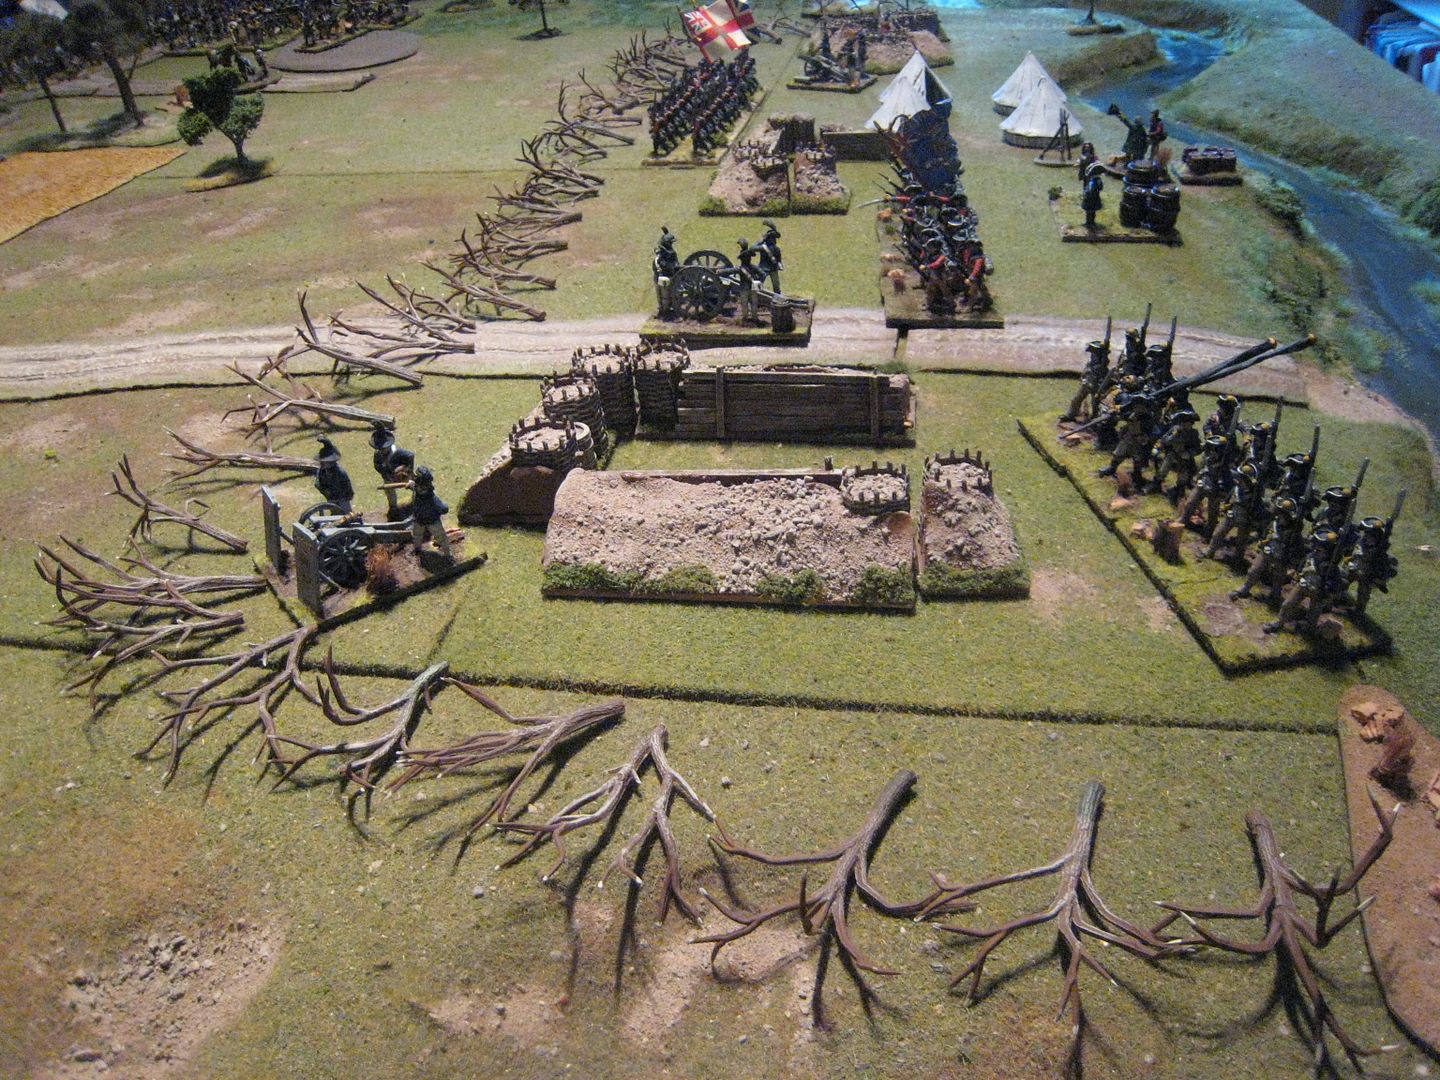
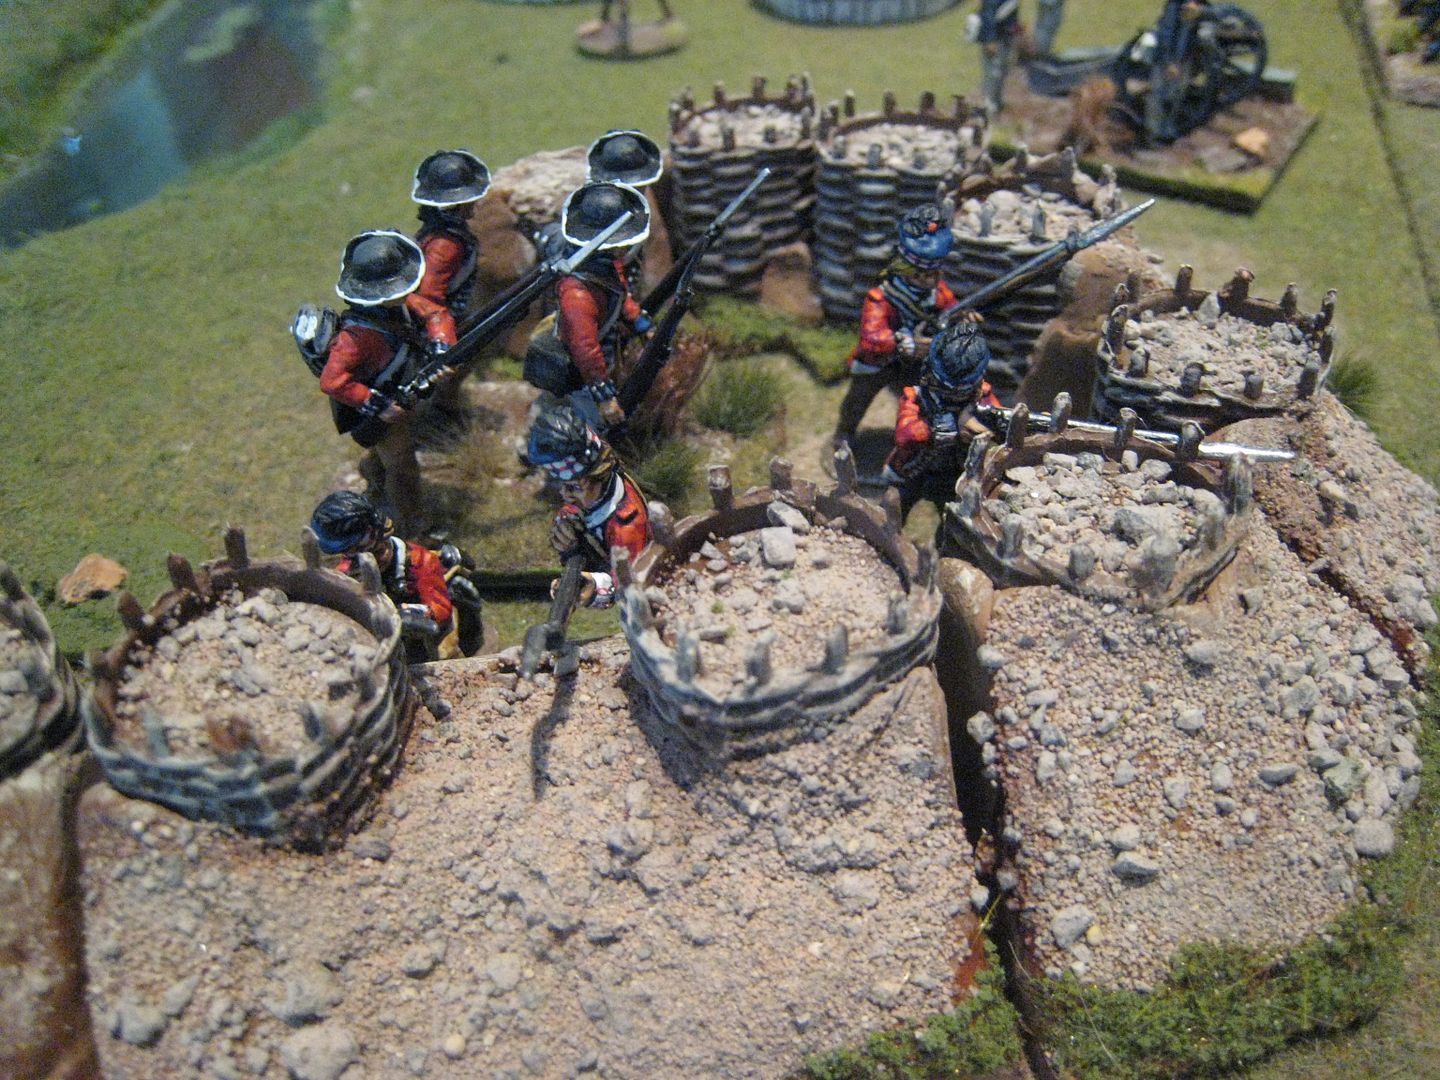
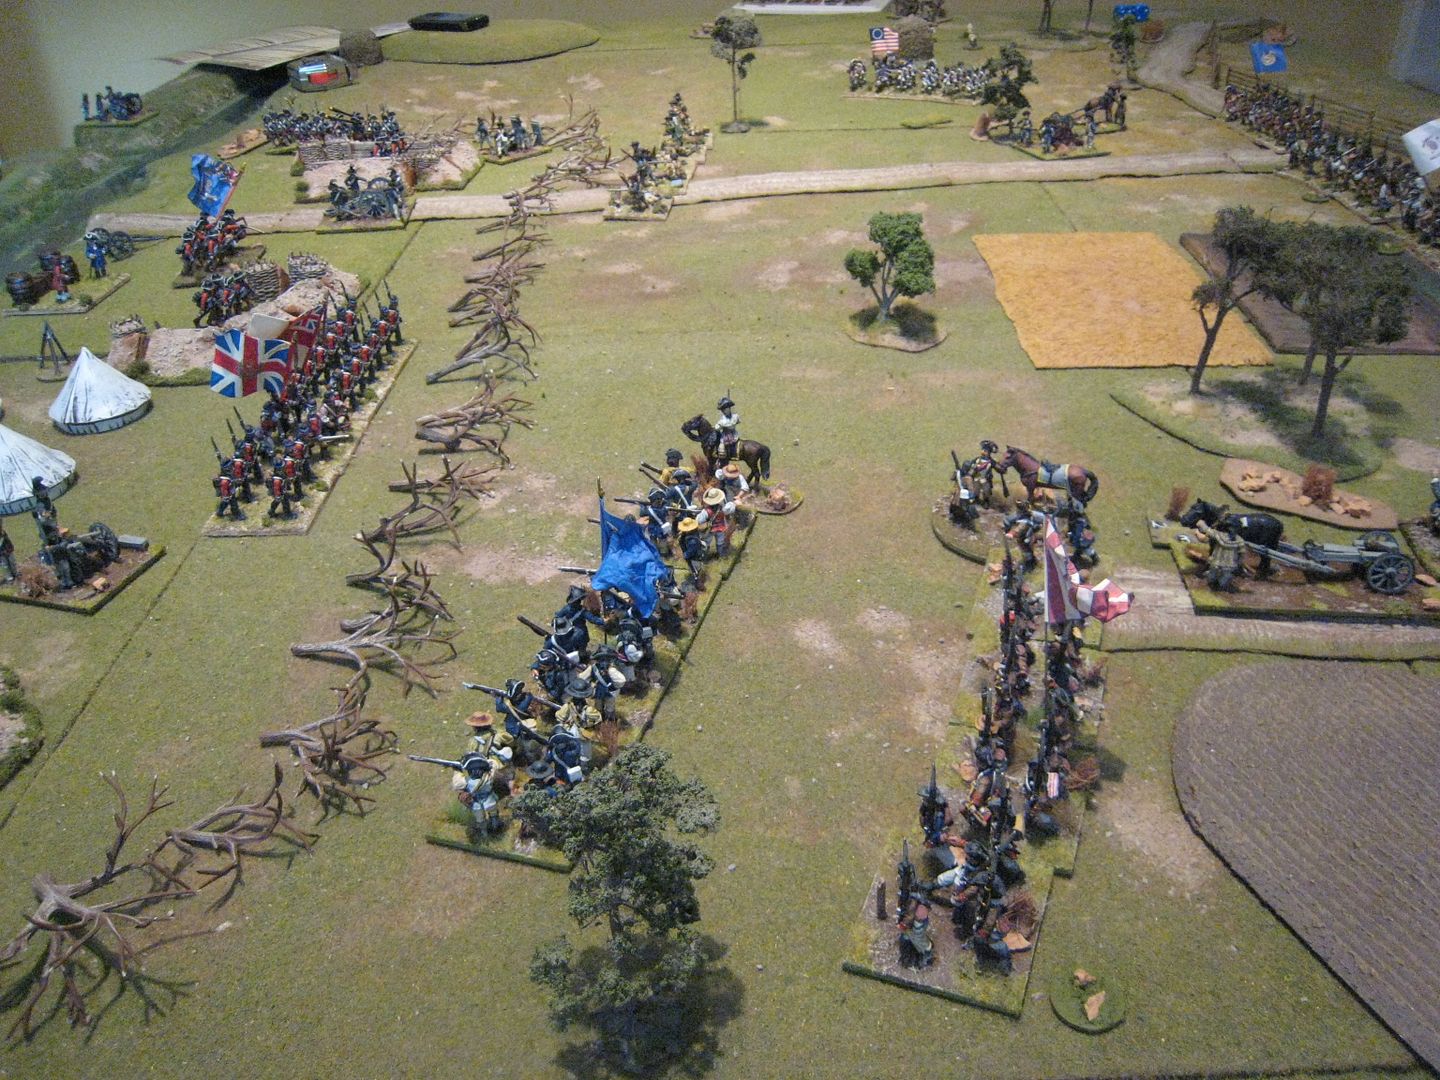
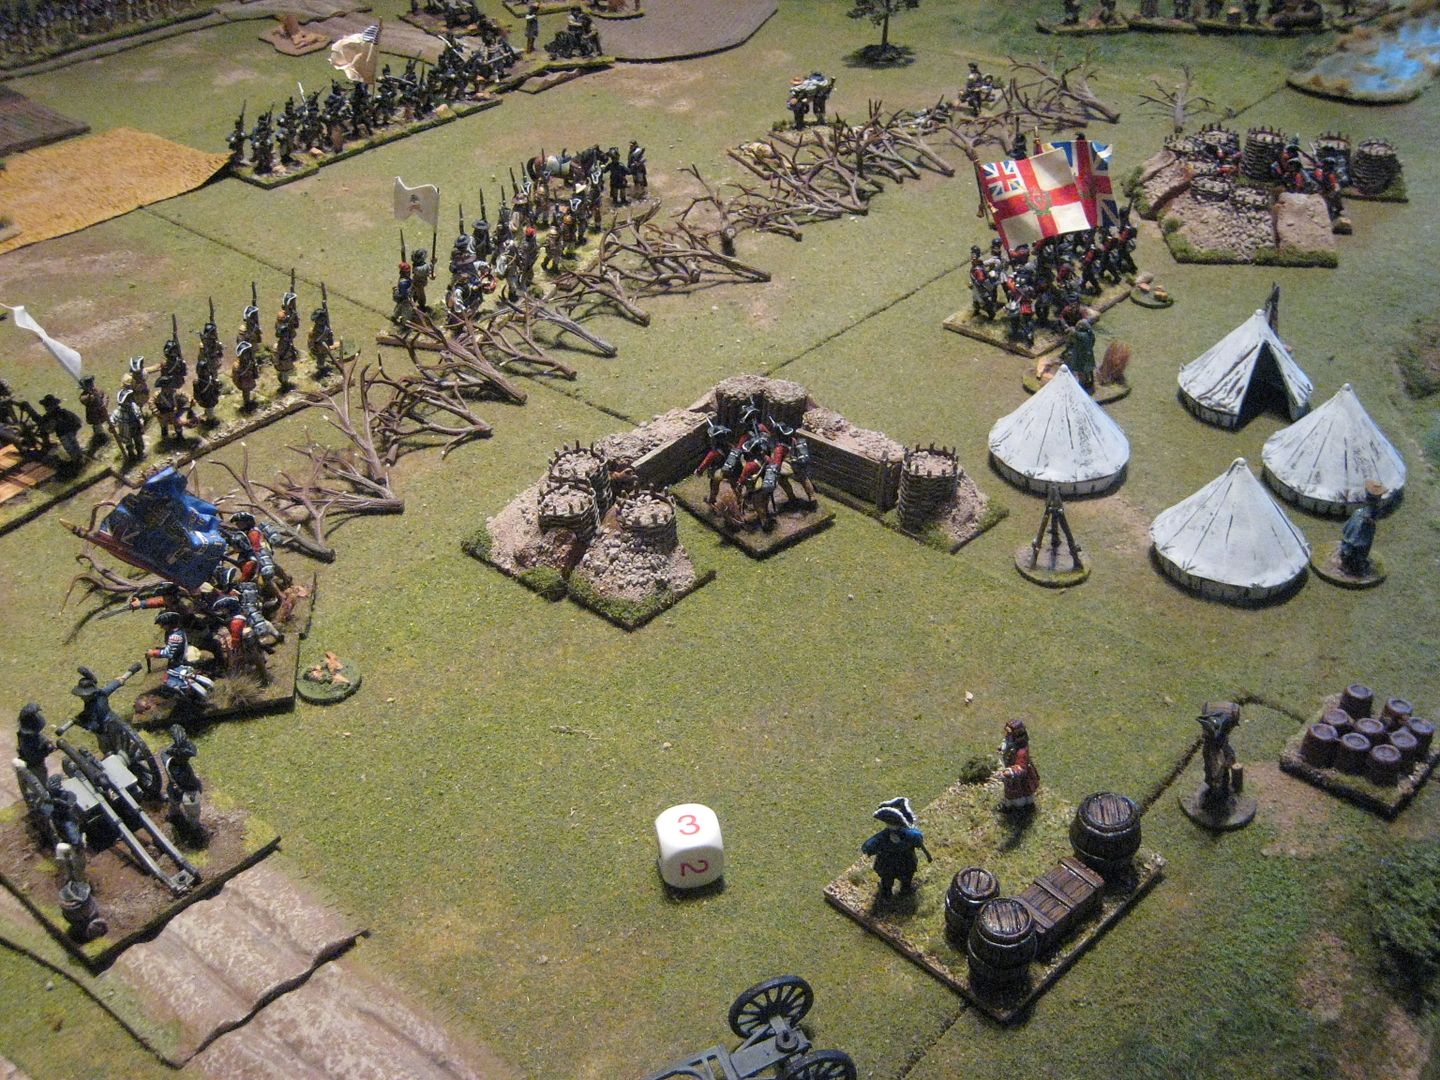
Here's the British camp.  The forces (at 1:10) consisted of: the 2nd battalion of the 71st Foot (24 figures); Hessian Regiment von Trumbach (24); South Carolina loyalists (24); one 6-pounder and two 3-pounders.  Protecting the camp are 3 redoubts, each of which has to contain 4 figures from the loyalist militia unit.  So with those reductions the British player basically has two decent-sized infantry units, one of which is graded "elite" (the 71st) and 3 pieces of artillery.  The 8-figure loyalist unit that remained after 3 bases had been detached for service in the redoubts didn't have much impact given its size. "Not much of a command for you", as Michael Caine said to Stanley Baker at Rourke's Drift, and clearly defending the entire perimeter would be difficult.  I had brought along the 4 figures from the King's Mountain Miniatures highlander range that I painted last year and these wee put in the redoubt on the right flank.  I don't think they were part of the official orbat, but we counted them for firing purposes.


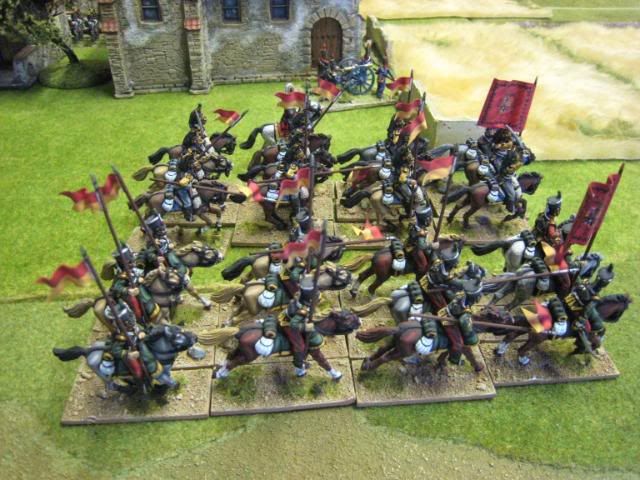
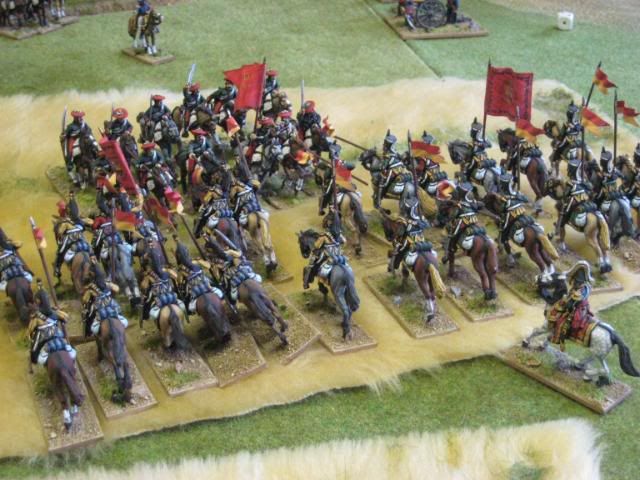
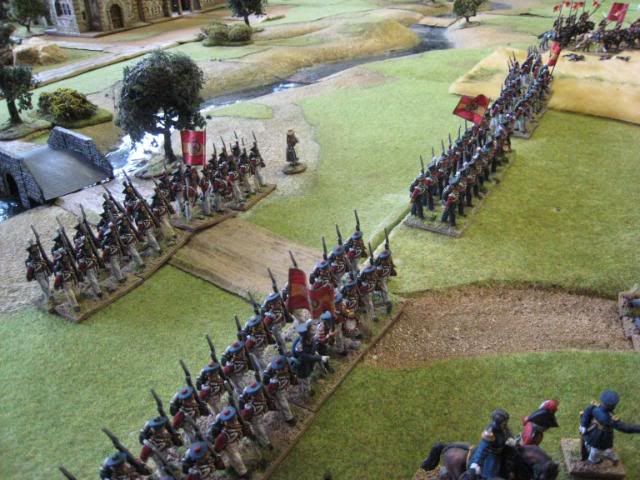
The American forces greatly outnumber the British ones.  The American player has: two 12-figure skirmish units; four Continental infantry battalions (24 figures each); one Continental light infantry battalion (18); five militia battalions (of 16 and 18 figures); some militia cavalry and four guns.  That's three whole brigades, although the frontage of the British camp is such that the American player cannot bring everything to bear at once.

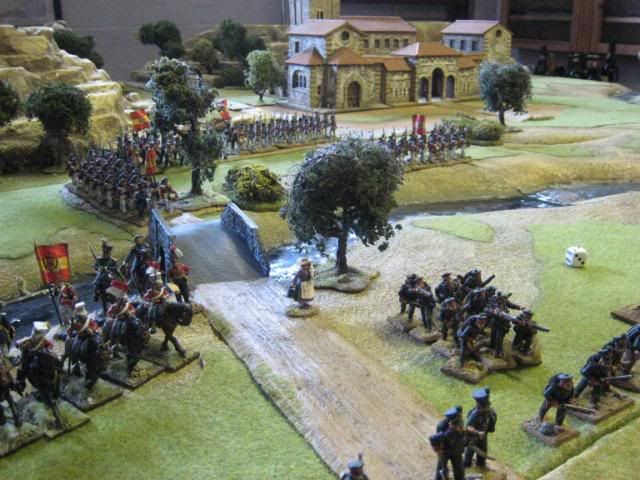
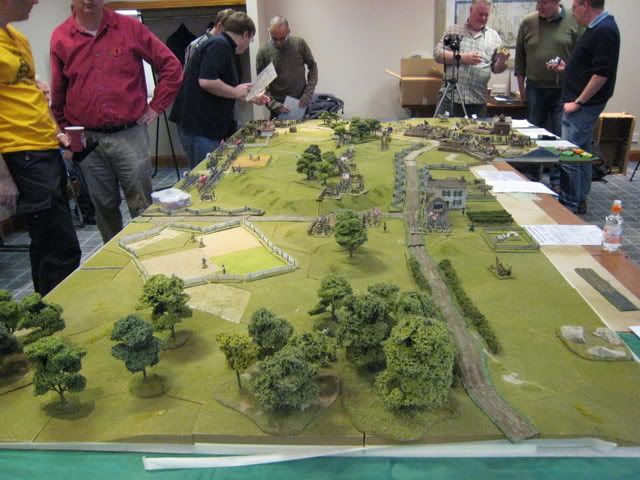
Ronan took the American side and I took the British, while EC umpired and generally threw in suggestions. The first three or so turns involved the Americans advancing into position.  On the American left the leading light infantry unit became bogged down in swampy terrain, but otherwise the units advanced steadily and Ronan began to move his militia brigade around to his right to attack the left flank of the British position.


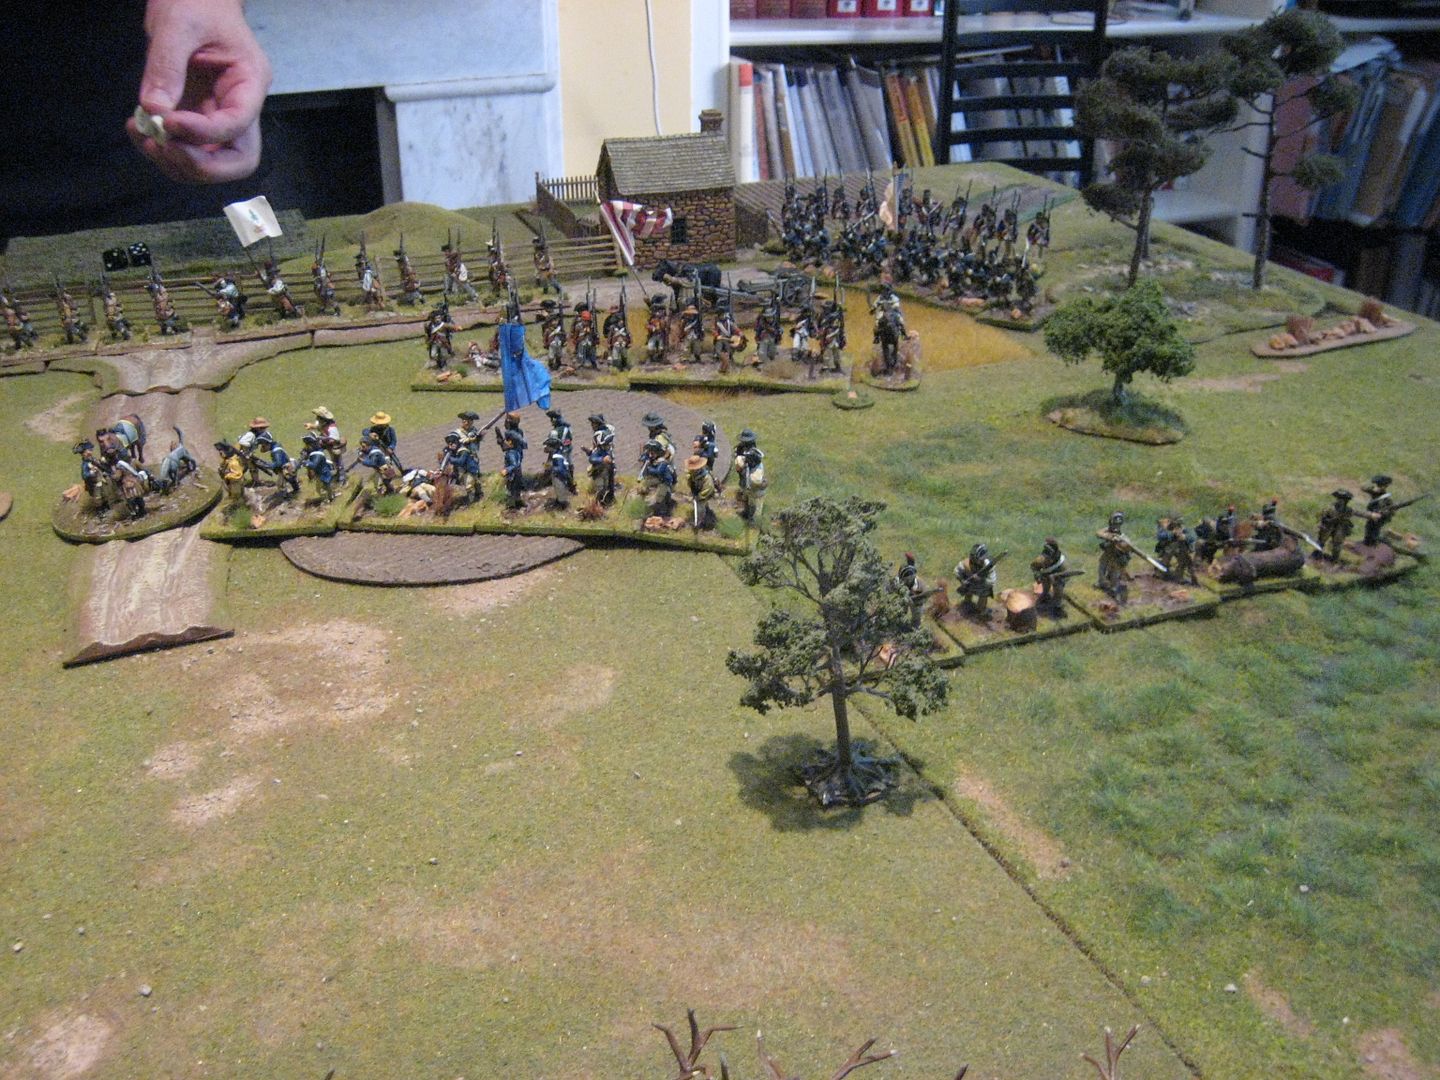
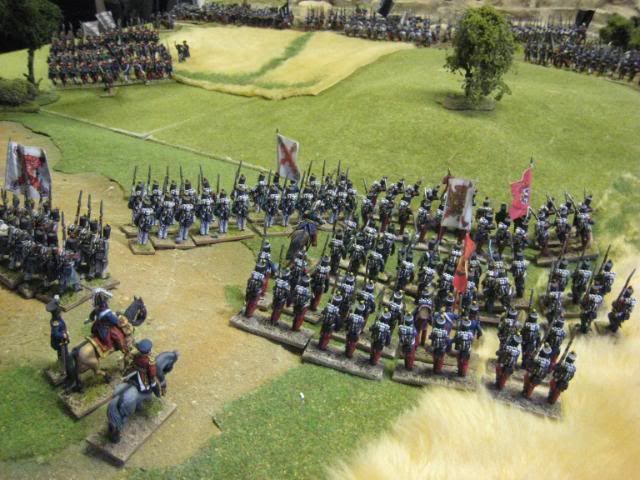
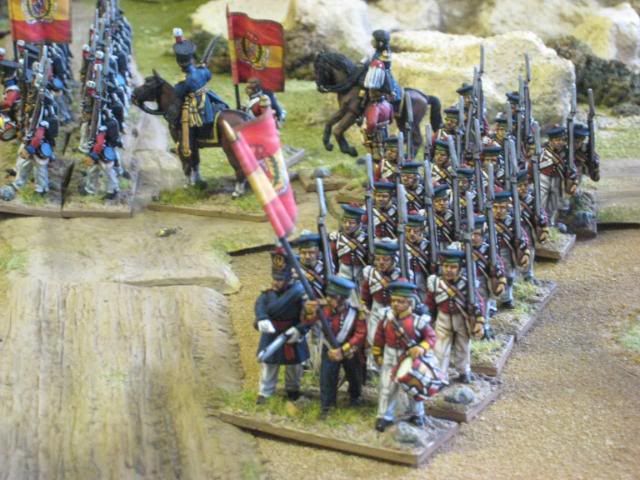
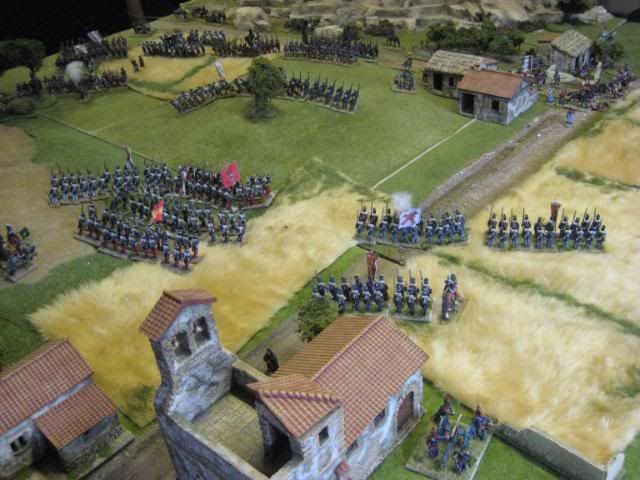
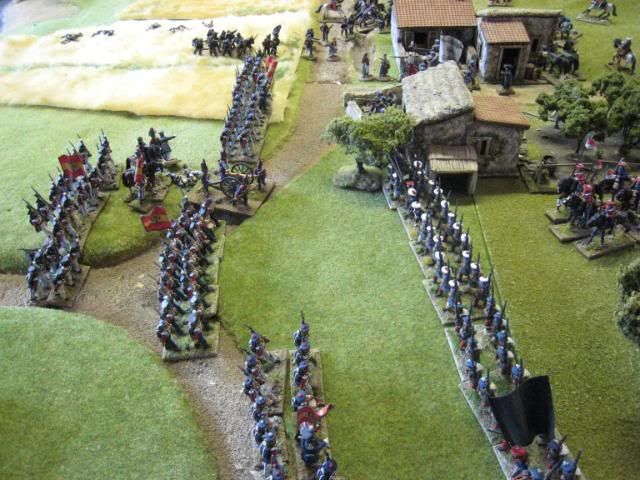
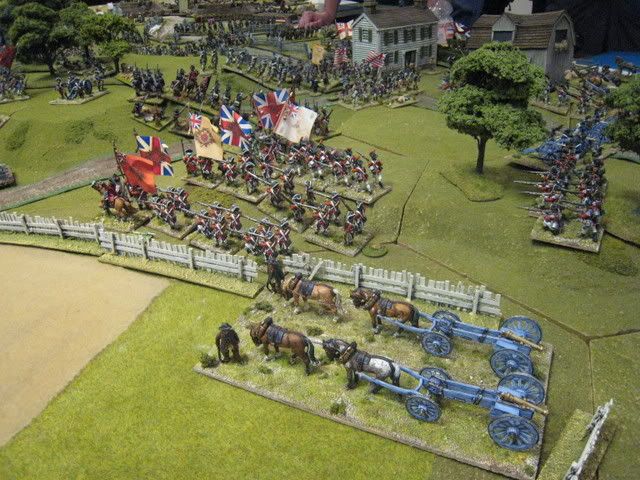
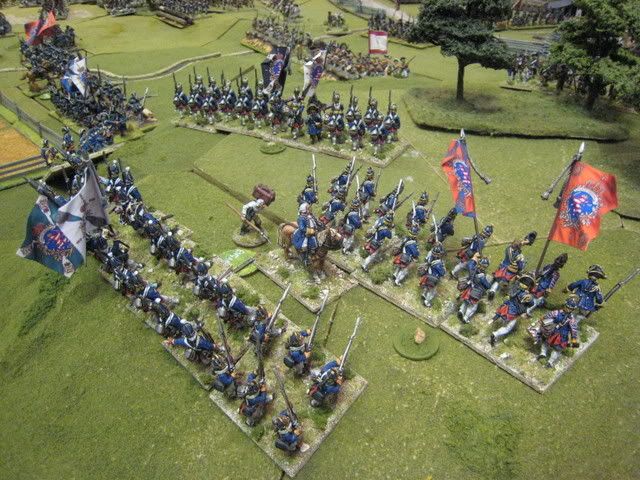
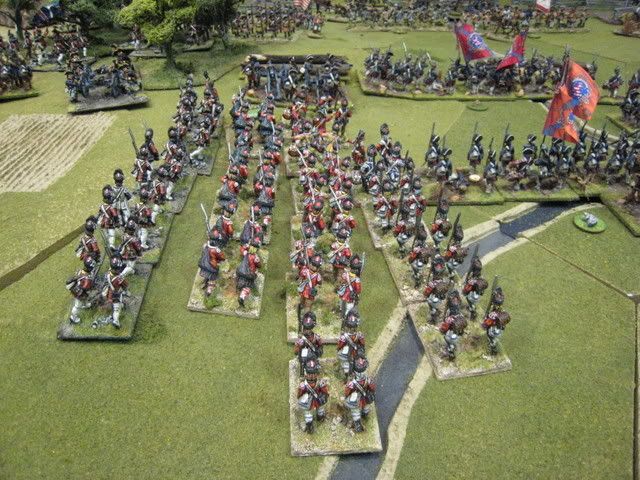
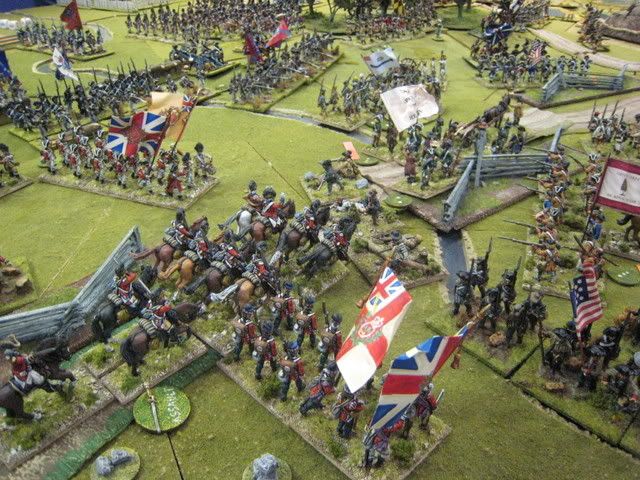
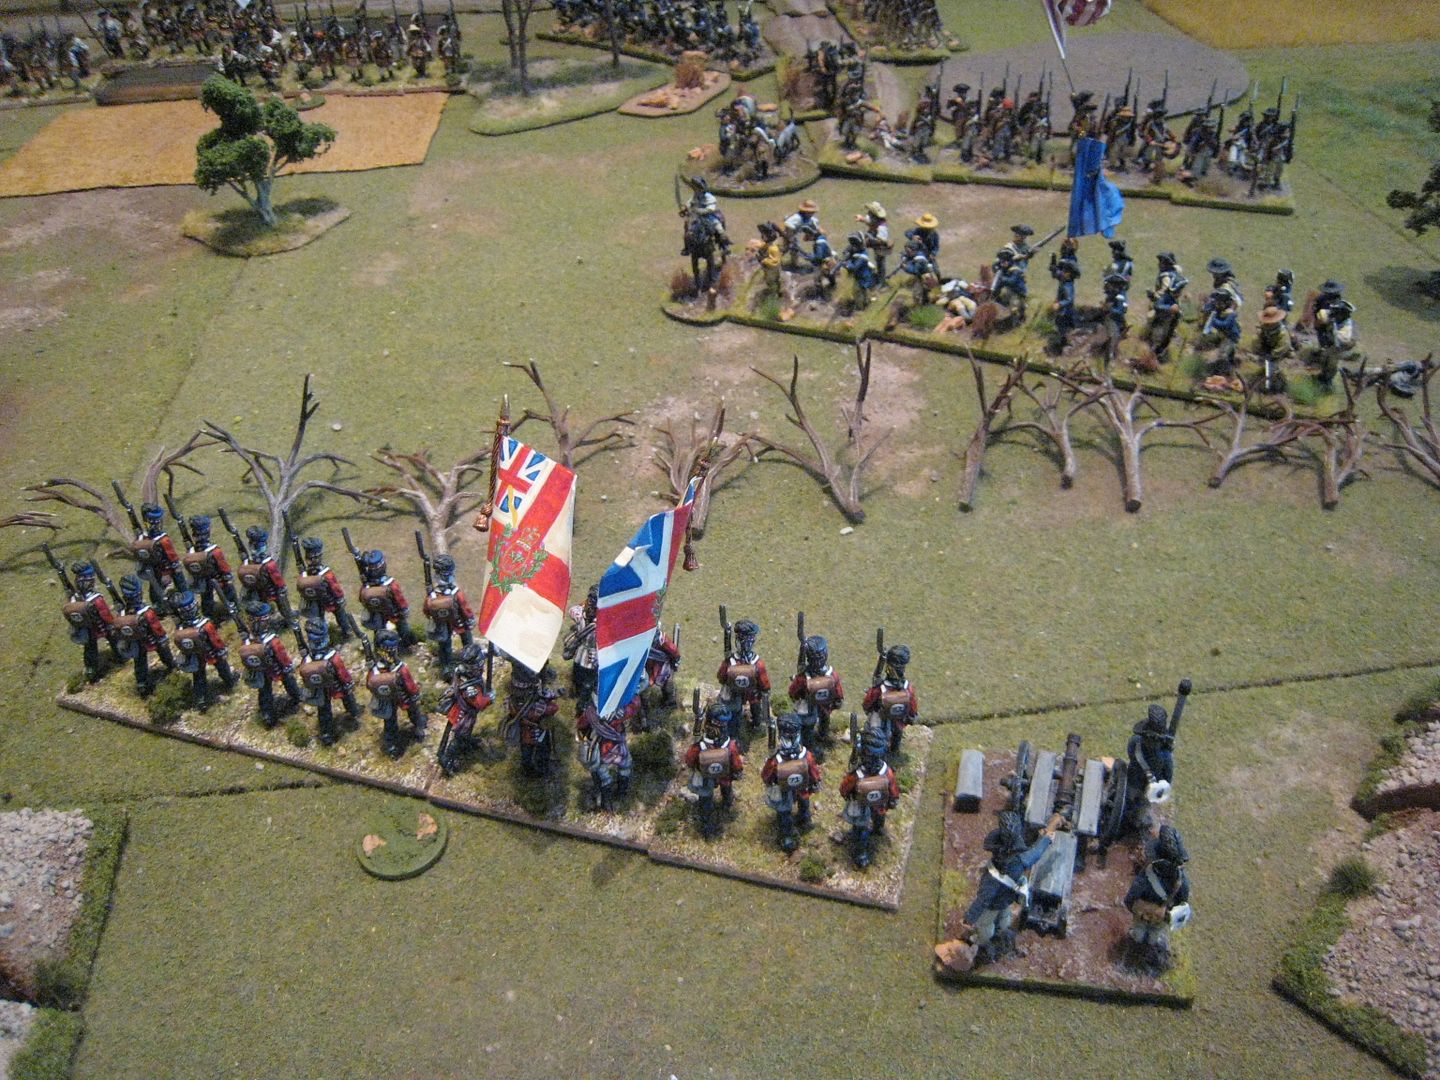
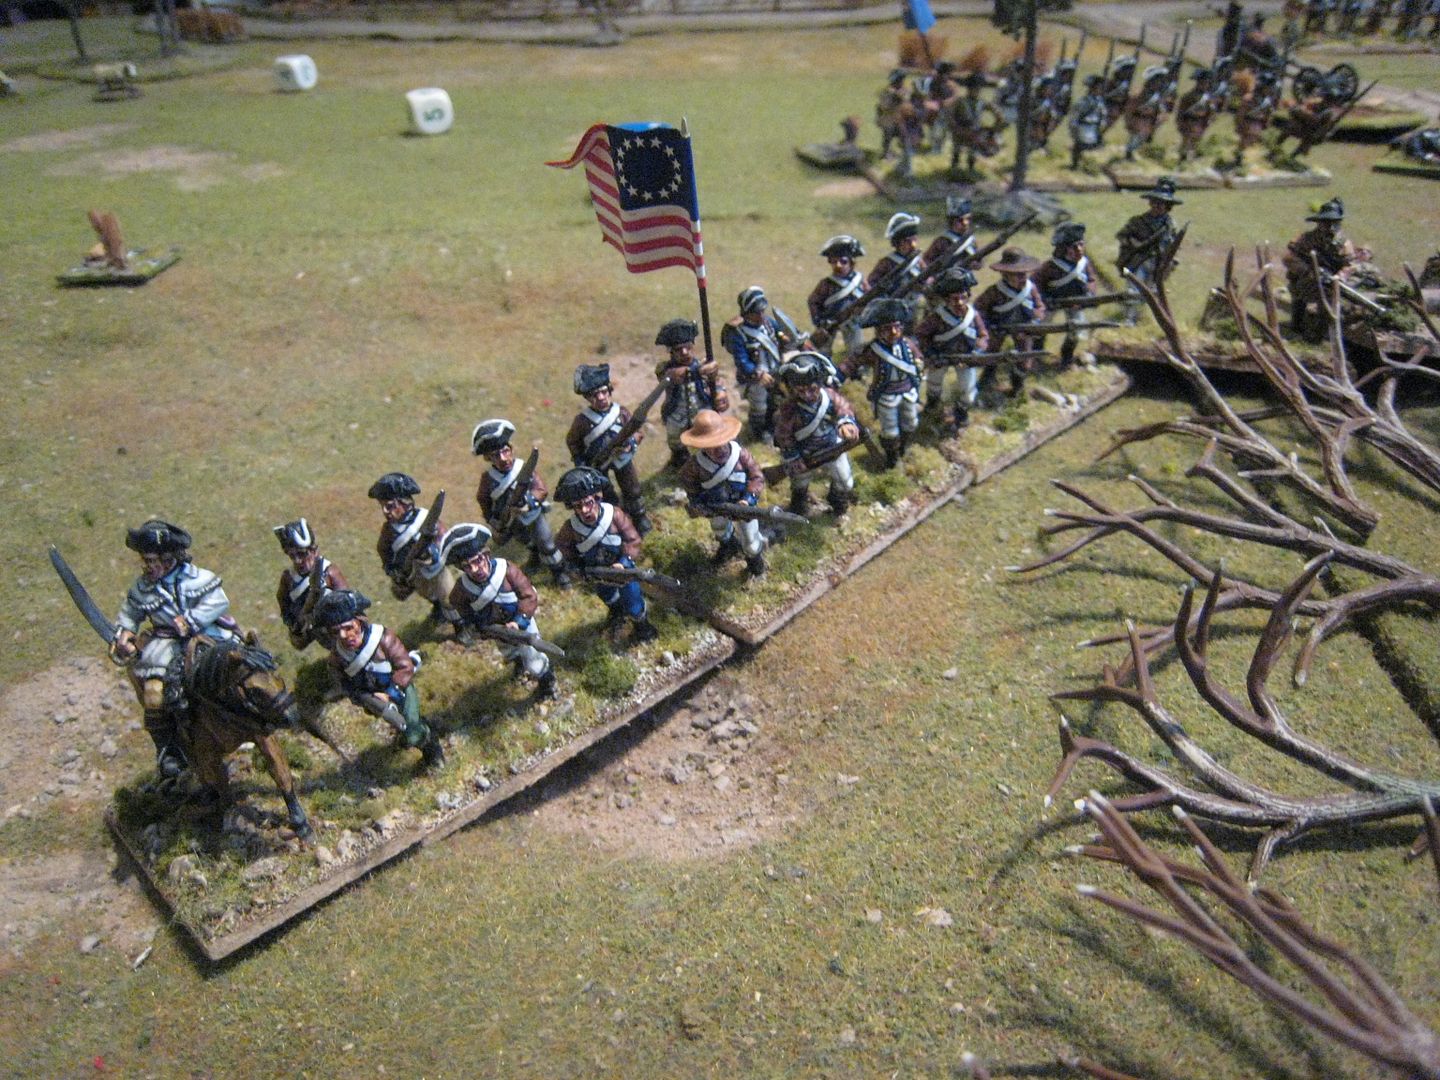
 I thought there was little point in moving my troops around.  EC had said that the 71st can be split into two units of 12.  However, I decided early on my strategy as the British player would be to resist running around the perimeter and instead concentrate fire on a couple of lead American units in the hope that this would cause some morale problems and provoke a couple of brigade retreats.  Most of the American units are graded "militia" so morale will be fragile under pressure.  That said, the brigade assaulting the British front-right, where the 71st was positioned, consisted of regular Continental infantry which would be harder to break.  Eventually the Continental brigade came into range, with a Georgia regiment in the lead and various battalions of militia in support:


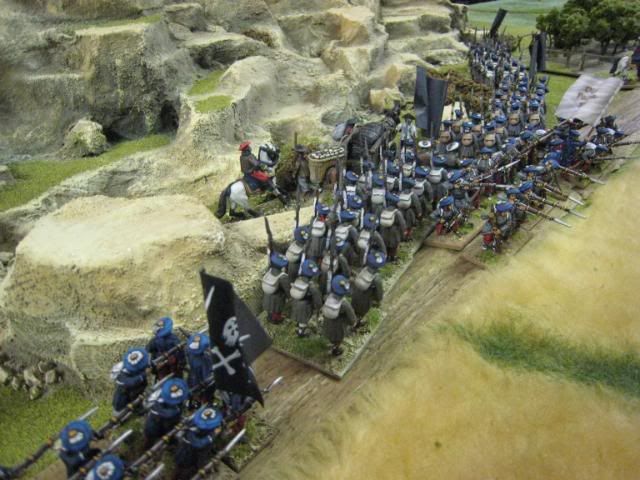
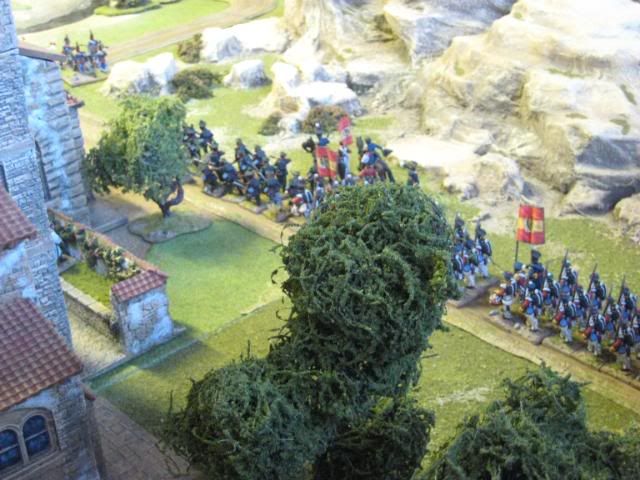
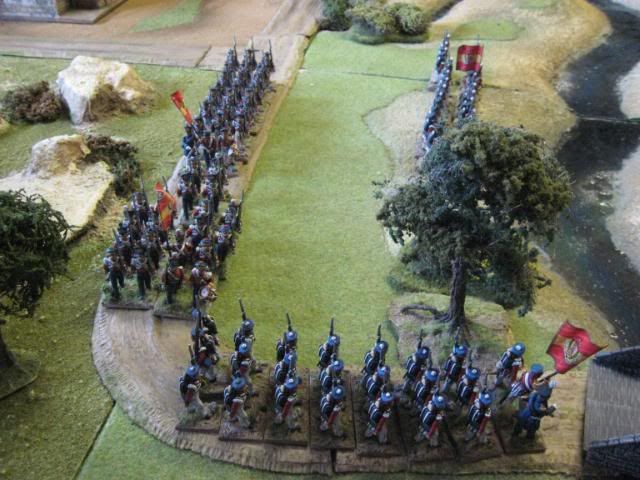
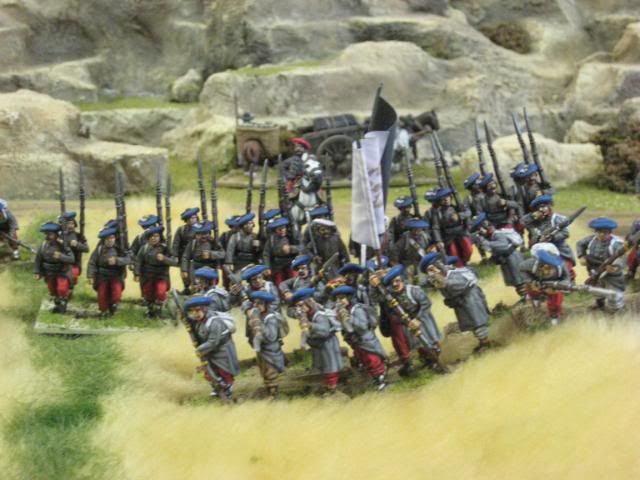
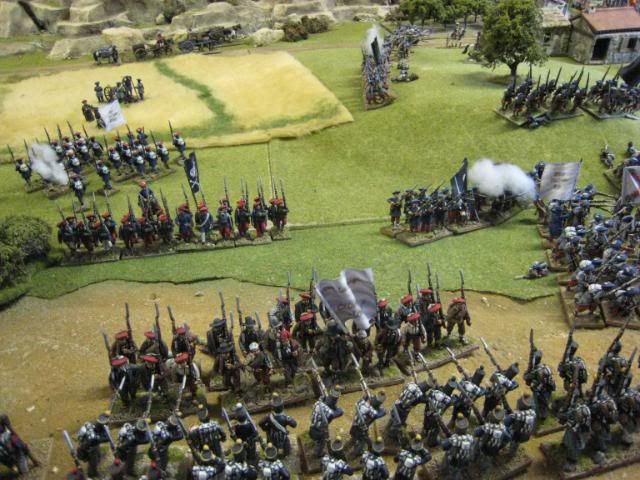
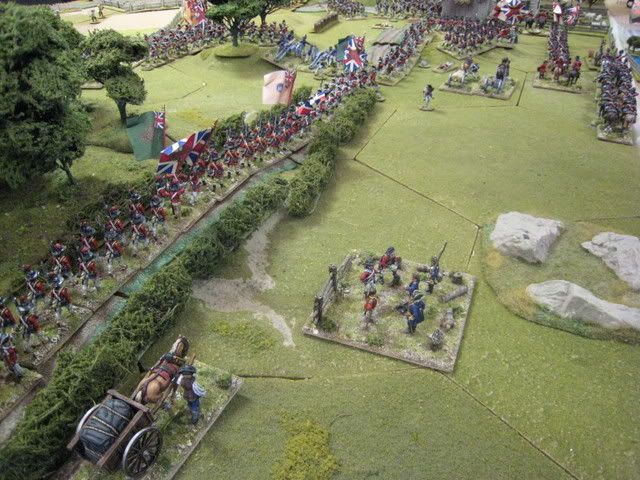
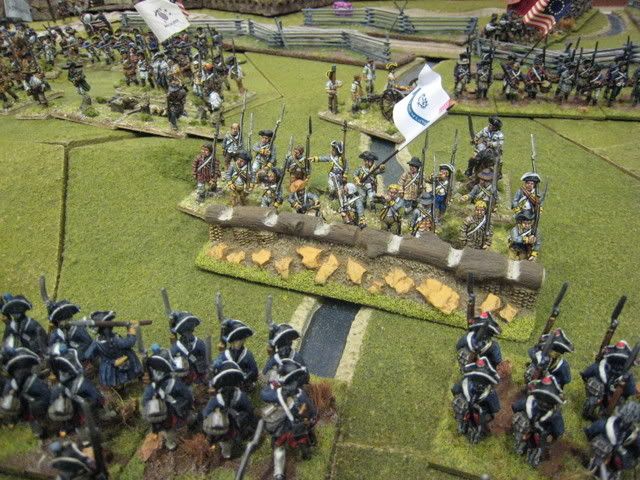
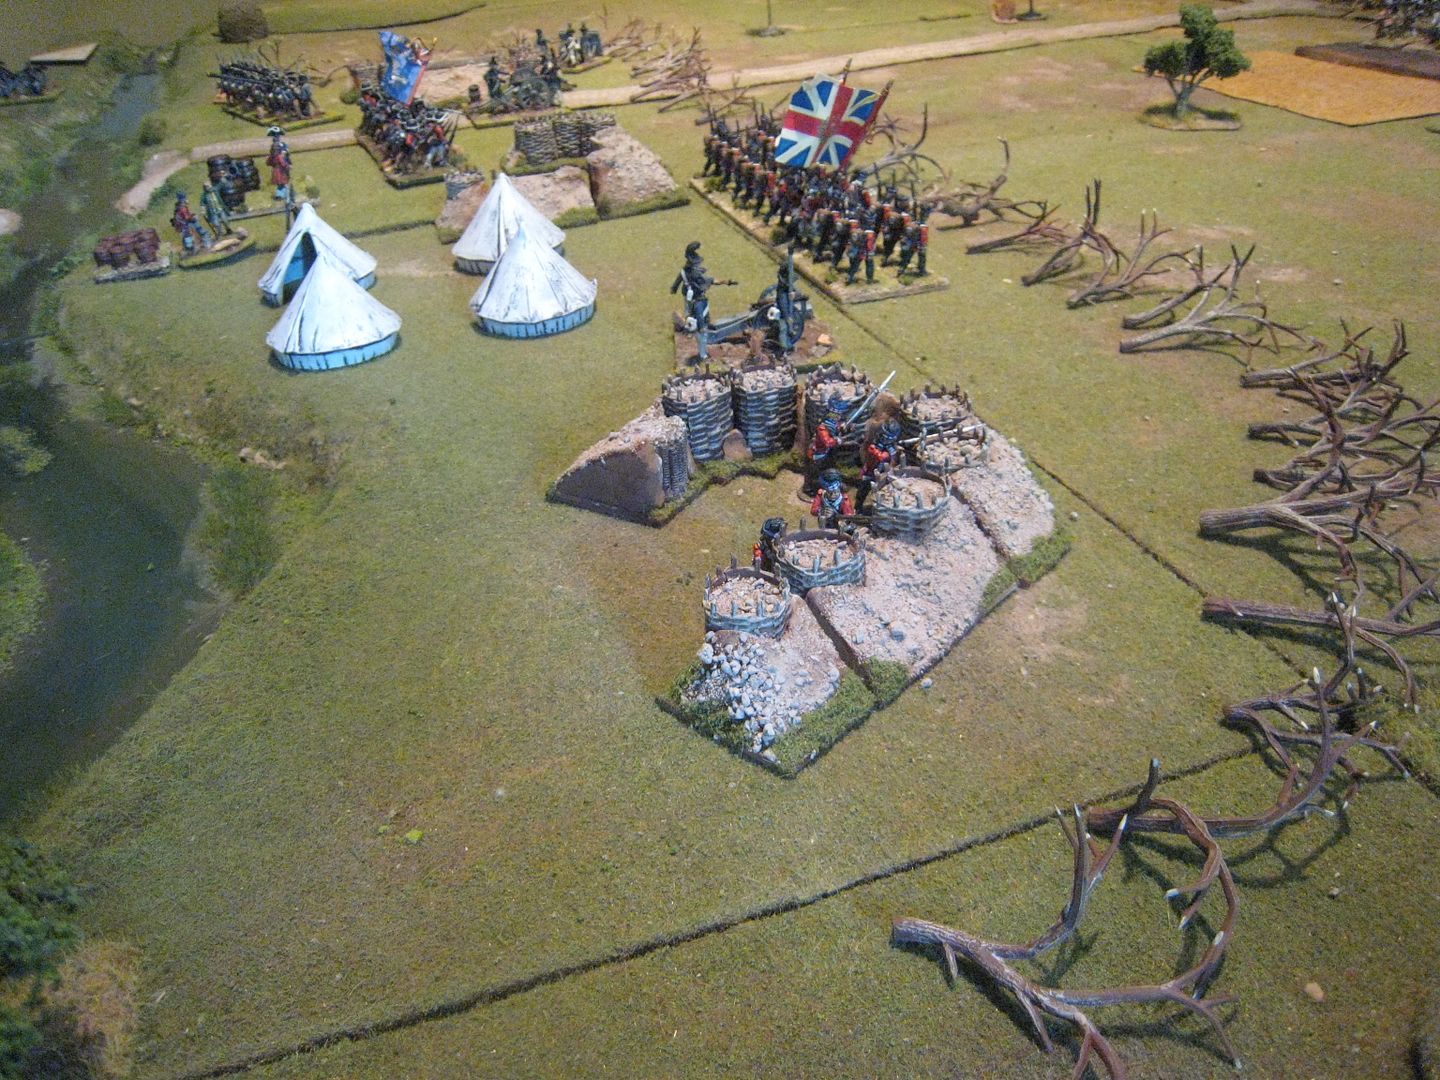
Over on the British left, the Hessians could see the American light infantry move around to the side of the position while riflemen skirmishers started probing the front of the abatis:


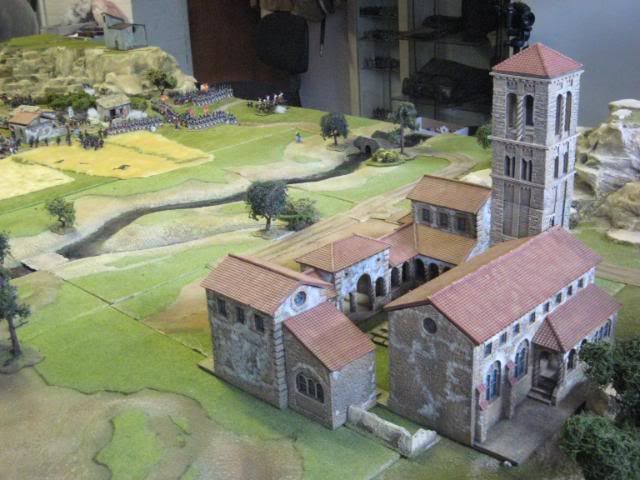
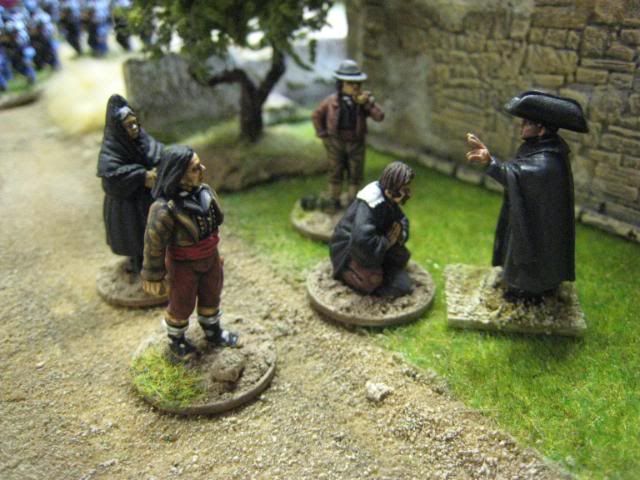
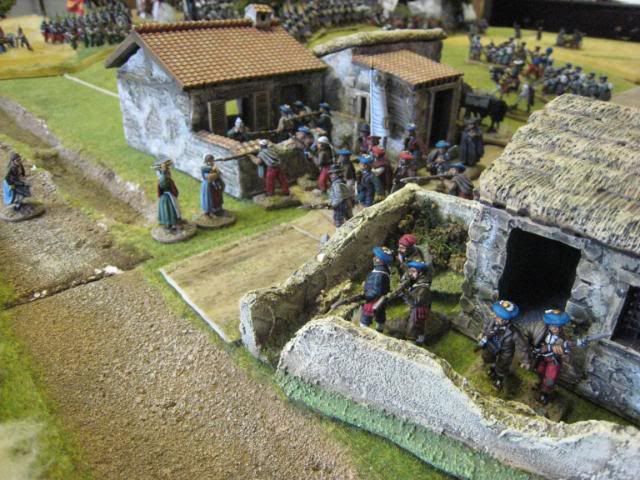
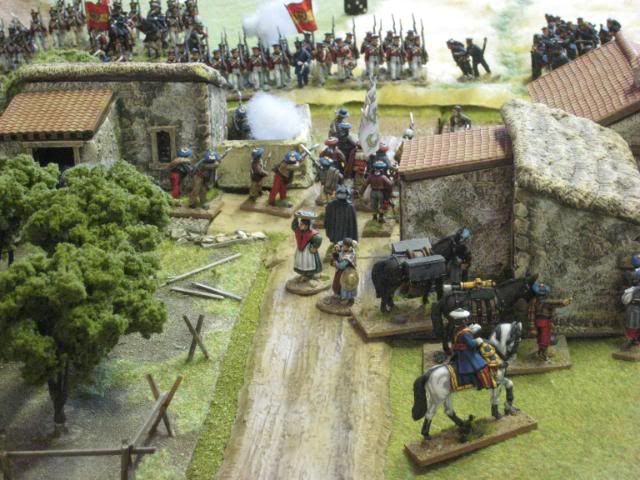
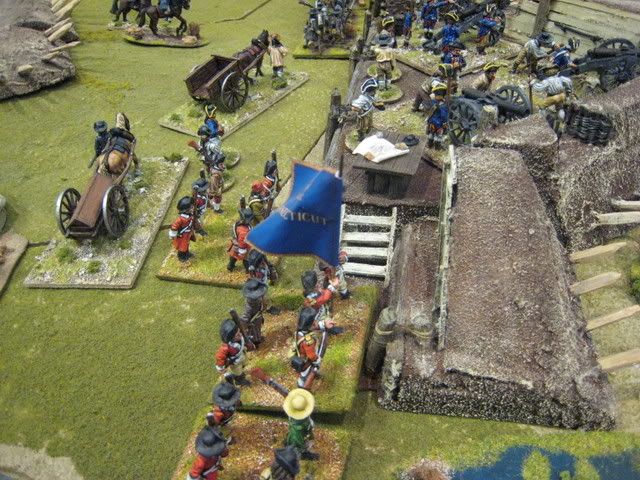
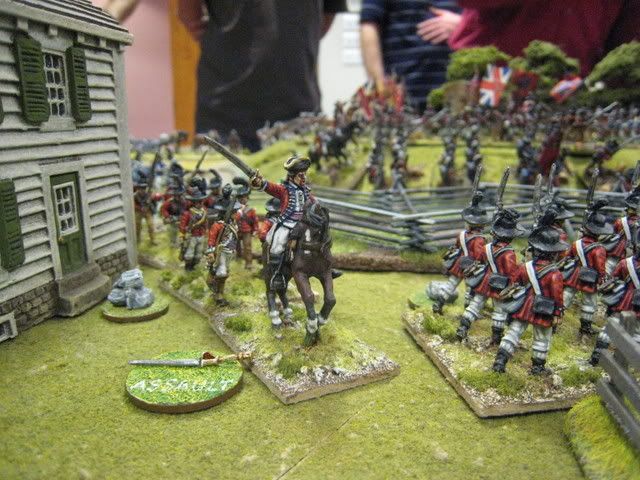
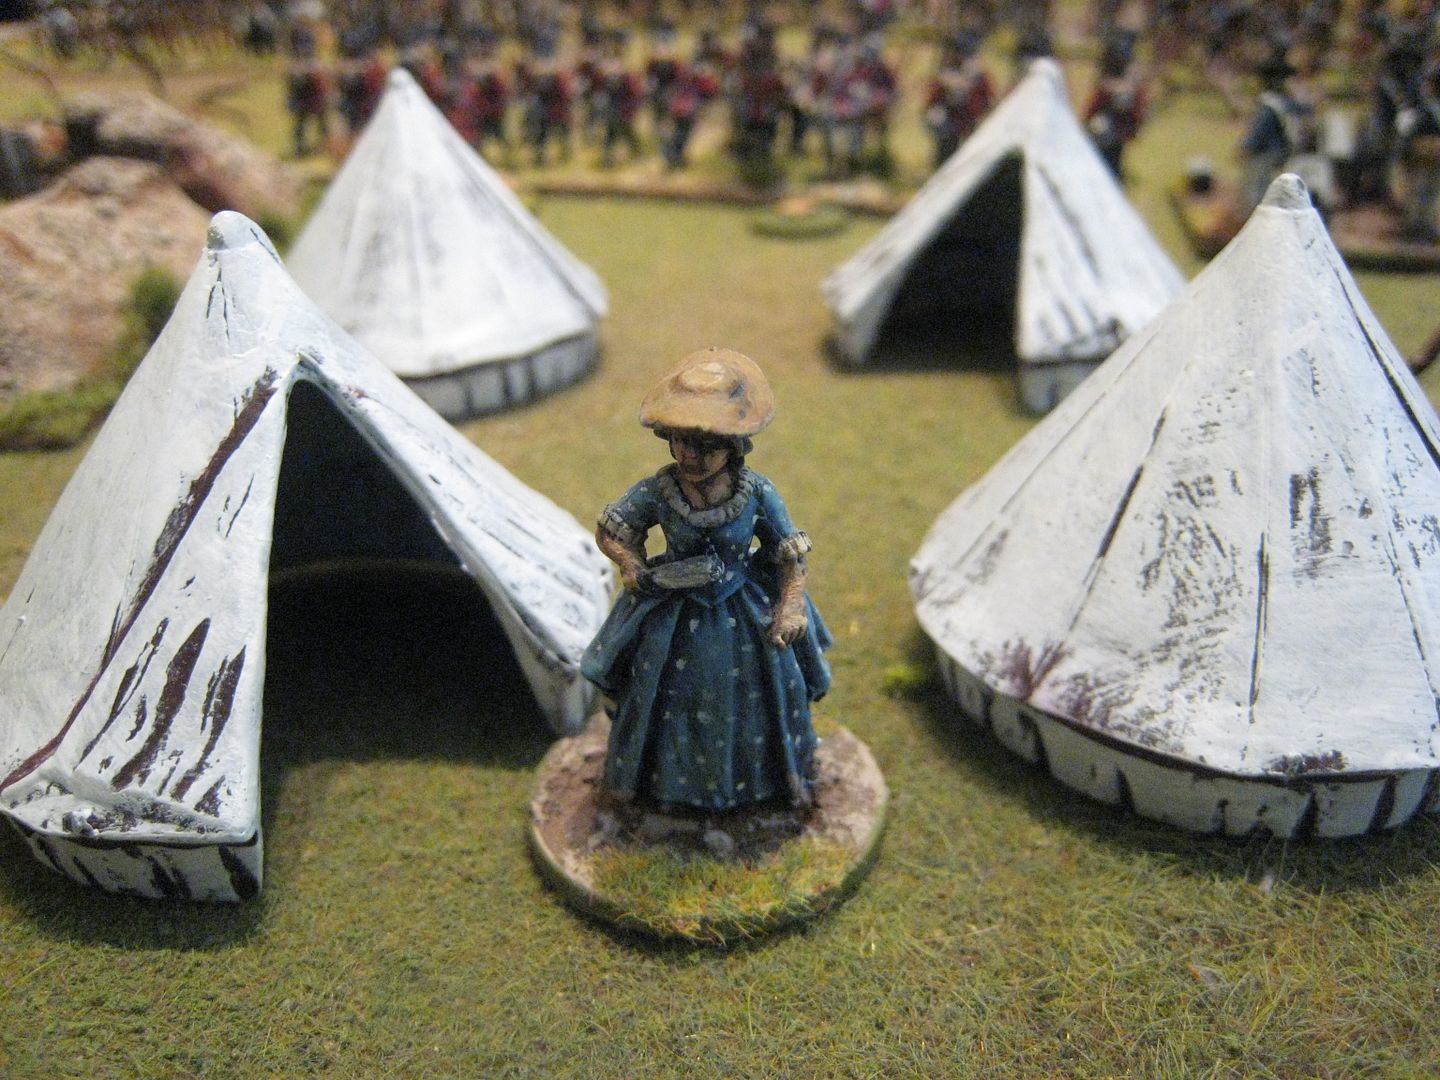
Maitland's mistress emerged from his tent to see what all the noise was, while fire-fights began and both ends of the British position:


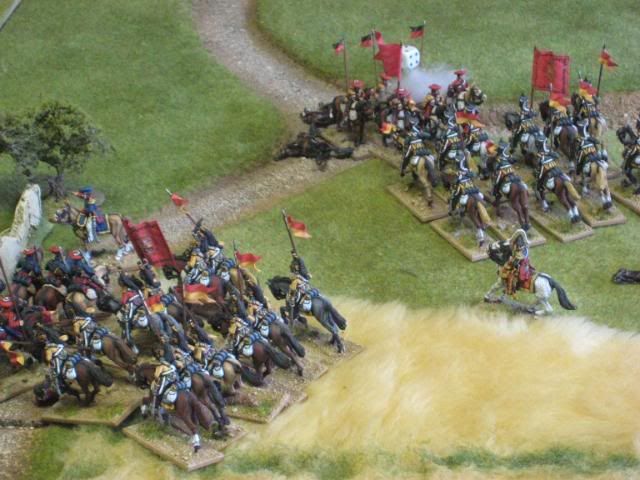
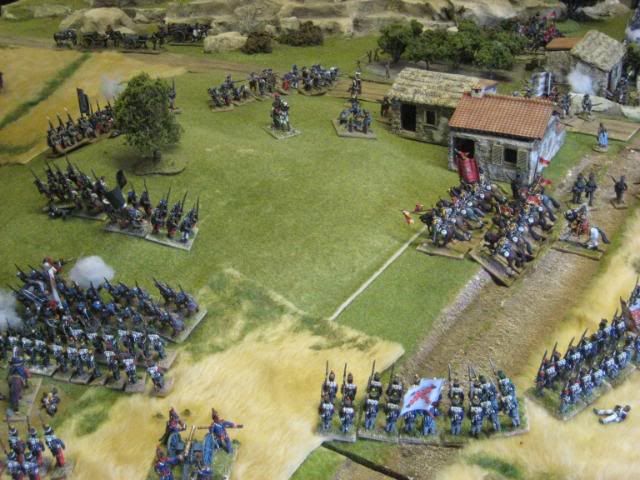
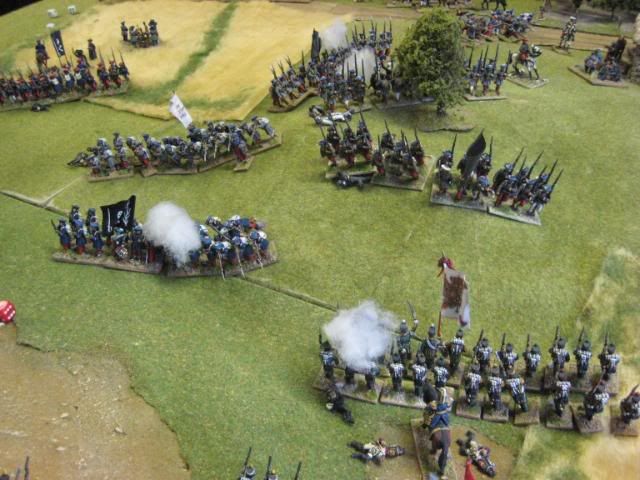
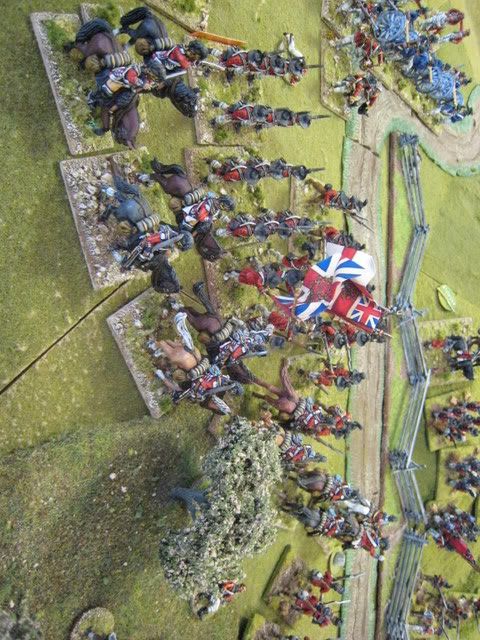
Ronan found himself rolling low dice on his firing, while I was rolling reasonably high.  The American Continentals, opposite the 71st, survived a couple of morale throws resulting from high casualties being recieved.  But eventually the Georgians broke and took the rest of the brigade with them:


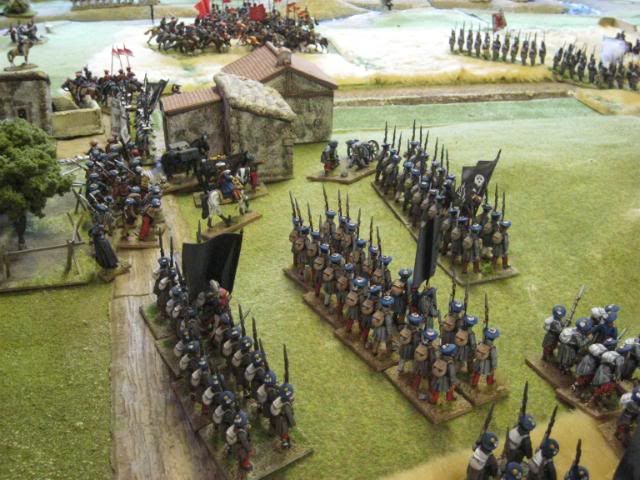
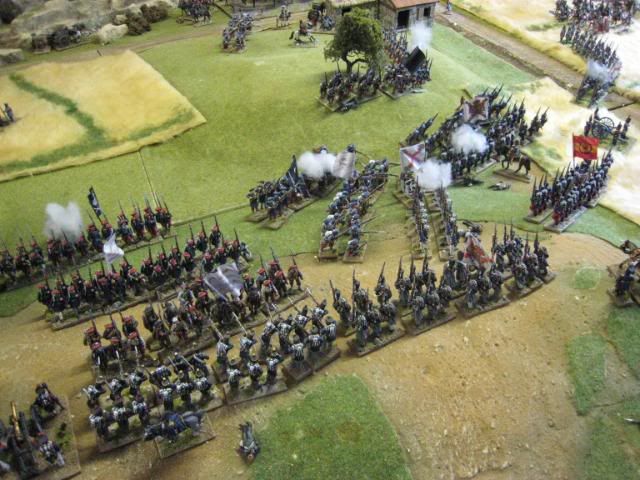
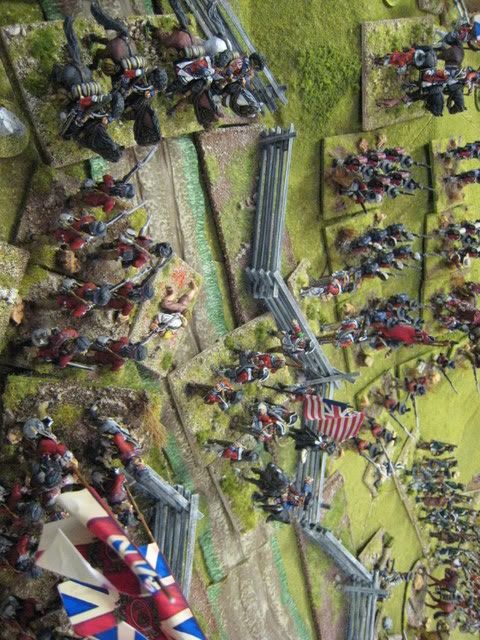
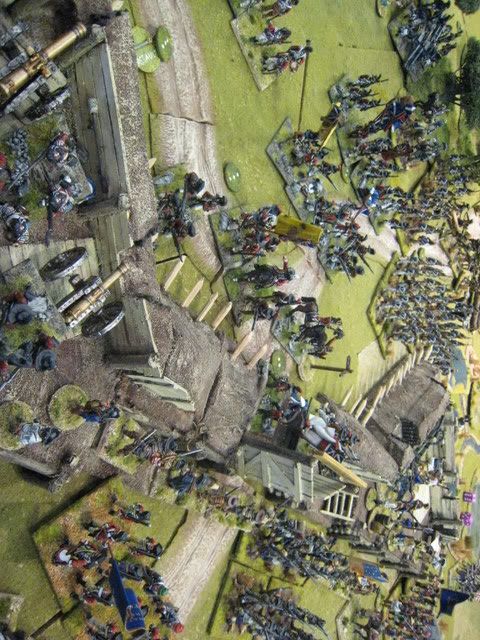
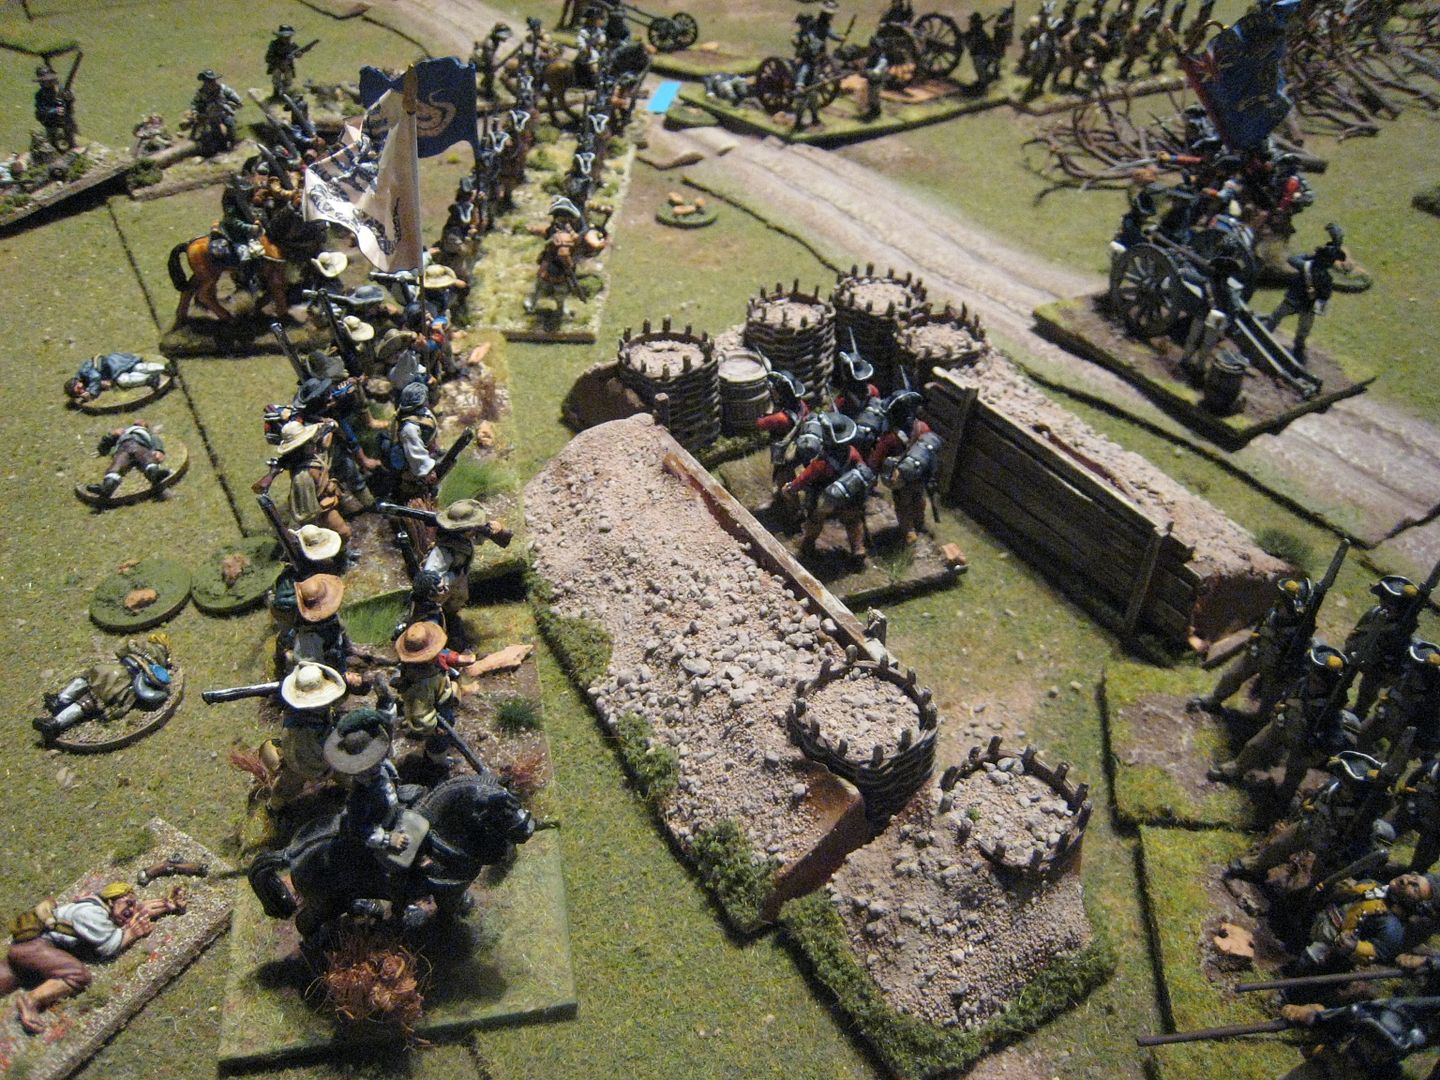
However, the Hessians came under increasing pressure when the skirmishing riflement to their right broke through the abatis.  The rule we used was that a unit had to remain at the abatis for one turn, representing work cutting through all the branches, and then took one DP (disruption point) going through it.  The British guns were firing canister at close range by this time, but I began rolling low scores and this swung things in favour of the Americans on the left.  Eventually, depiste taking casualties, the American light infantry broke through the abatis and overan the British 3-pounder battery at the corner of the position as more American militia approached the Hessian right.


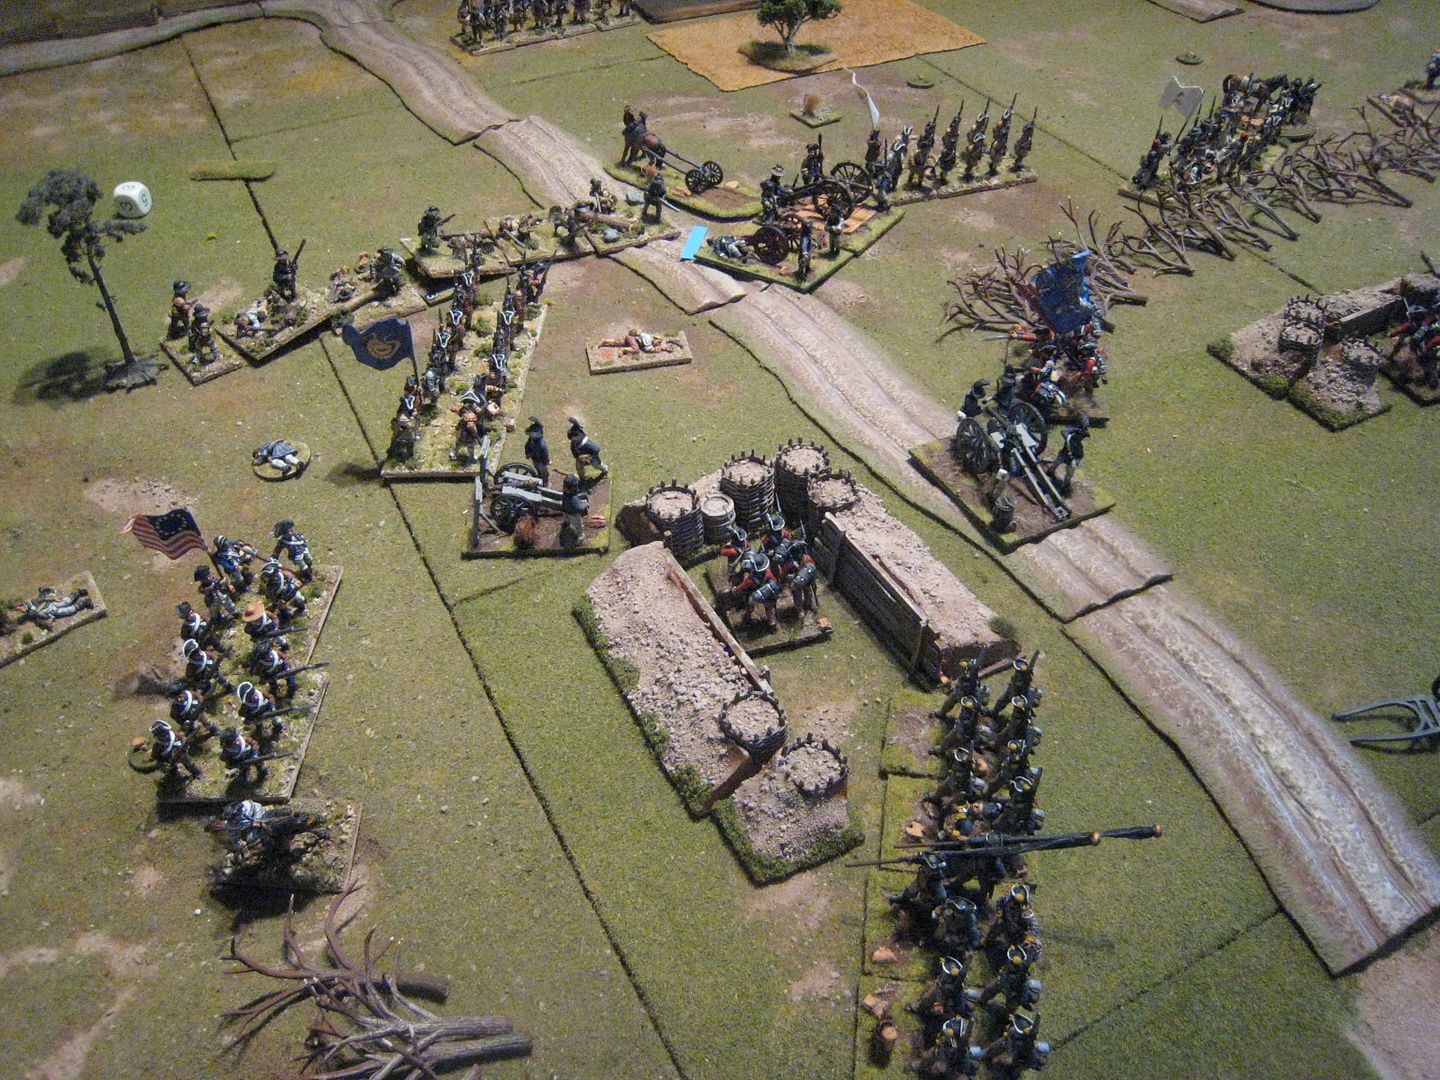
Over on the British right, the 71st were now taking enfilade file from the guns that the Americans had brought up in support of their attack. The highlanders started taking heavy casualties and I realised that instead of a defence line I now had isolated pockets of troops that would not be able to deal with all the Americans now reaching the British camp.  As time was running out we accelrated the arrival of the third American brigade, which assaulted the redoubt in which the Hessians had now sought refuge.  Behind them, the 71st finally failed a morale throw and it was all over for Maitland.


This was a game where fortune seemed to ebb and flow very quickly.  When the Continental brigade retreated I thought "let's now do the same on the other side of the camp" but the dice failed me and the position was reversed.  Winning the initiative and so having the ability to fire first was crucial for the British player, and I lost that too in the later stages.  Another problem for the British is being able to move inside the camp.  What I probably should have done was to play a fighting retreat back away from the abatis and keep the units together, instead of allowing troops to get cut off.   The American player needs to control his dispositions carefully, as otherwise units are left in the middle of the table with nothing to do.  Getting into shooting contests is also unhelpful for the American player - I suspect the best thing is to get over the abatis as quickly as possible and try to overwhelm the British.  Of course if charges fail to go in, as happened with the Continentals, one is left stuck in a firefight.  We had thought that this game might be over very quickly, but in fact it kept going for about 10 turns and we weren't quite finished at the end.  

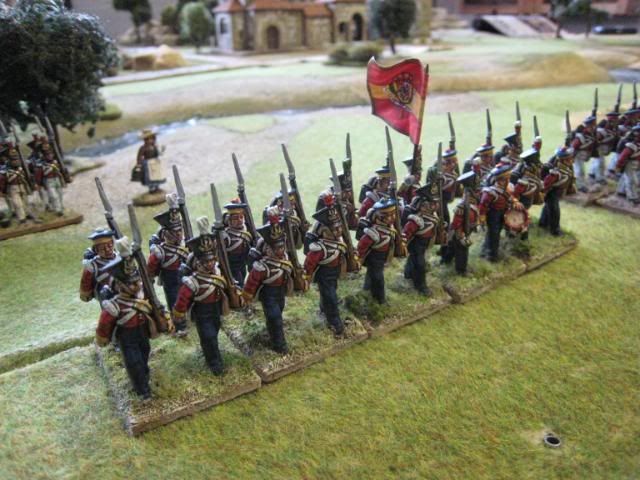
It's a neat little scenario.  You get the chance to have a British camp and lots of Southern militia types on the table and the American player has rather more thinking to do than in several other better-known battles.  I painted my 71st years ago using Perry marching figures, but I'll have to paint another battalion's worth using the King's Mountain Miniatures firing pose figures.       

Monday, 14 September 2009

The Battle of Dario - First Carlist War


Some weeks ago now, back at the end of June, "Eclaireur" and I went up to Nottingham for a couple of days to say hello to the Perries and take part in a large First Carlist War game. I bought a handful of my figures for the Isabelino side but the game mostly featured figures from their own collection painted by the likes of Javier Gomez, Jim Bowen and others. Each side had at least 15 units and I remarked to Michael that this game must have been the largest (at least in 25mm) FCW game the world has seen! I have delayed posting an AAR because first I wanted to post about the regiments I have been painting to set some kind of context for the game and so that readers can identify some of troops among what is probably a pretty unfamiliar set-up. The rules used were the forthcoming "Black Powder" set; I make a few comments about how they work at the end of the report.


It is summer 1837 and the Carlists, on their way back to their Basque heartland from the Royal Expedition around north east Spain, have found themselves intercepted by a combined force of Isabelino regulars and the British Auxiliary Legion. The scenario is straightforward: the Carlists, entering from the left in column of march, have to escort Don Carlos off the right edge of the table. This involves dealing with an Isabelino assult on their right flank and crossing a river on the other side of which is the British Auxiliary Legion. Alan Perry took the role of Don Carlos, Eclaireur commanded the BAL and I had the rest of the Isabelio force. Michael Perry umpired.


Here are the opening moves. The Carlist vanguard is advancing into the village of Dario whilst the Isabelino left flank is cautiously moving towards the main Carlist column. However, a brigade or two of Carlists are already moving to confront the threat on their flank:


A couple of moves in. The Carlist column is racing to the river whilst a sizable force is send out to deal with the Isabelino flank attack. My 3 brigades came on in column and were promptly caught out by the speed with which the Carlists reached them, so preventing a full deployment into line. Luckily, an attempt by the Carlist to outflank my left was dealt with by a 6-pounder and a sturdy battalion of regulars. Carlist cavalry exited Dario to race to the river; I combined the various Isabelino cavalry regiments into one brigade as a shock force that I could deploy into the area to the front of Dario should the need arise.


Meanwhile, the BAL moved into position on the right bank of the river, after taking some potshots from priests in the nearby monastery. Alan did in fact roll some dice to see whether the BAL took hits from these warmongering Catholics!


It became clear that Alan Perry's customary aggression had resulted in the majority of the Carlist army leaving the column to take on the Isabelinos main force. That gave Eclaireur the chance to quickly push the BAL across the river to assult the Carlist column head on.


Whilst he positioned his force to cross the bridge, I sent the Isabelino cavalry brigade on a charge against the Carlist cavalry that screened the crossing point. The Carlists were swept from the field and the crossing was cleared. Hurrah! The BAL crossed the river and the Rifle Brigade quickly deployed as skirmishers in front of Dario village.


Unfortunately, the Isabelino cavalry did a "Scots Greys" and found themselves thrown back by musketry and cannon fire; the light cavalry broke and fled the field. Back on the Carlist right flank, the Isabelinos had taken up a defensive position and found their entire line charged by the Carlists. The resulting melee was inconclusive for several turns. My plan here was to contain the Carlist counter-attack whilst the BAL got stuck in on the right. If the French Foreign Legion were here, I'm sure the battle would have been over by now...but Michael hasn't made the figures yet!


The BAL continued its assault on the front of the Carlist column, which had retreated back into the village of Dario, whilst the left flank of the Carlist attack, on the other side of the village, found itself exposed to the remaining Isabelino cavalry.


Eventually, the slug-fest on the Carlist right resulted in a key Carlist brigade failing a morale test and the entire army began to retreat. As the Isabelino army began a general advance, Don Carlos was spotted shaving off his beard and moustache and donning a peasant woman's clothing. He would have to fly south to raise a new army...


This was, obviously, great fun. Hopefully the pics convey a sense of what a colourful period this is and what excellent figures you can now use in 25mm. "Black Powder" gives an exciting, if rather frenzied, game. Some of the mechanics toook a bit of getting used to, such as the ability of units to "leapfrog" over units to their front. As noted above, the movement system means that units move around very quickly, once the orders reach them. I confess I can't quite remember how the casualty mechanics worked, but I think the attacker rolls and the receiving player has a savings throw - or something like that. "Eclaireur" noted that the rules on unit formation didn't allow for infantry to deploy into open order, which could cause difficulties in something like the AWI, and no doubt there are other points that more experienced gamers than I would niggle with. But overall "Black Powder" give a quick and exciting game. There is a reason why this fictional battle is called "Dario", but the reason is a matter of "what goes on tour stays on tour"....

Friday, 7 November 2008

Long Island, 27 August 1776


I've found a way around Blogger's tinkering with photo uploads and so finally here is a report of last weekend's "British Grenadier!" mega-game. Many of the photos have already appeared on the web, but there are a couple of new ones . In all, we played 18 turns over some 10 hours. Apologies for the length of this post and feel free to skip to the end to see who won!


Long Island was the largest battle of the AWI and one of the best chances the British had to inflict upon Washington's army the kind of decisive defeat that may have ended the war. The British attack featured the wide flanking march that General Howe liked to use (cf also at Brandywine the following year), which aimed to catch the Americans in the flank whilst their front was pinned by another assault. The table, shown above at the start of the game, had the Brooklyn Lines at one end, with the left flank of the American position stretching down the Jamaica Road. The marshland of Gowanus Creek can be seen at the far end of the table to the right of the Brooklyn Lines. The lines themselves were specially made for the game by Martin Small. Eclaireur knocked up some nifty painted plasticard sections to represent the coastline and water. Below are a couple of early shots of Clinton's brigades beginning to advance.


Long Island is a fairly one-sided game as the British, with an overwhelming superiority in both numbers and calibre of troops, can't really lose. Therefore, for the purposes of this scenario, and to make it interesting for the American players, the victory conditions required the British to actually storm the Brooklyn Lines: to win, the British had to have at least 3 battalions in the lines by the end of the game. This assault on the lines themselves is something that Howe refused to do on the day - whether he was doing his "gentleman thing" and giving Washington the chance to surrender, or was wary of the casualties that might arise from a frontal assault given his experience at Bunker Hill the year before, we don't know. But the purpose of this scenario was to see whether the Brits could do it and storm the lines without incurring disproportionate casualties as they did at Bunker Hill. So there were two sectors to the battle - the frontal assault led by the Hessian general von Heister and the flank assault led by Clinton. Von Heister had a brigade of Hessians and two brigades of British line (under the commands of Grant and Agnew). Clinton had much of the army's elite, namely Cornwallis' brigade of the 71st (in 3 battalions) and 33rd, together with light infantry and dragoons under the command of Brigadier Leslie (I took this brigade and the role of Clinton). The American army was a jumble of militia, Continentals and state troops, inferior in quality in theory but full of pluck, as the Brits were to discover.


There were some minor alterations to the historical orbats. The 4th grenadier battalion and one of the reserve brigades were detached from Clinton's command and given to the British centre (a shrewd move as it happened). The Americans had the benefit of additional brigades behind the Brooklyn Lines, which quickly moved out to bolster the lines of defence.


The first encounter was between von Heister's units (commanded by Jerry Taylor) and the American positions directly in front of the Brooklyn lines. The fighting was fierce and Brigadier Grant (Ally Morrison) was captured early on when his horse bolted straight into the Yank lines. The Hessians slowly made ground but took fairly heavy casualties. Meantime, Clinton's flanking attack quickly stalled due to poor dice rolling (i.e. accumulating "disruption points") and general congestion on the one road into Brooklyn. Clinton's reserve units never saw combat for the entire duration of the game, as they remained stuck behind the forward elements and couldn't get themselves into position. Clinton's attack was held up by an incredible rearguard defence by the Connecticut militia, which saw off numerous charges by the 71st and 33rd, one battalion of the former actually routing off the field. Cornwallis himself was hit and spent one turn off the field.


Von Heister's slow success in pushing back the Americans was not matched by Clinton and the American units blocking the road to Brooklyn soon found themselves with Von Heister's lead units to their rear. The situation became very messy and confused and one wonders whether the Americans' success on their left actually put them in a worse position strategically- instead of slowly contracting their line, the Americans found forward units surrounded or receiving fire from different directions. Von Heister was racing his regiments forward as fast and aggressively as he could, with the result that a couple of battalions reached the Brooklyn Lines whilst American units were still engaged in the passes.


The Connecticut militia continued to withstand attacks by Cornwallis' finest (despite being largely cut off and having seen the rest of its brigade destroyed) . Eventually, in the second turn of the second day, a charge by the 17th Light Dragoons routed them and succeeded where the 71st had failed. This was my only moment of personal glory, when in the post-charge melee Martin Small rolled a double-six for the militia only for me to then roll the same for the 17th (so winning the melee thanks to the modifiers). In true "Scots Greys" style, the dragoons failed to rally and kept on charging into the American units behind the militia, which were already taking flanking fire from the British Guards brigade, now moving into position on the heights overlooking Brooklyn. The 17th charged on and their success resulted in the American brigade in the area collapsing and so freed up the entire left wing for Clinton to finally move forward. By this point, the American units in von Heister's sector were retreating back to the Brooklyn lines, with British regiments hot on their heels. The first British units to assault the lines were quickly thrown out. A second attack by the units on Vaughan's grenadiers brigades was initially more sucessful, but ultimately the grenadiers also had to withdraw. In the meantime, the British had concentrated their artillery into a grand battery that was pumelling the Brooklyn Lines.


By this point, some 8 British battalions were poised to assault the lines and "time" was called. It seemed clear that the British would be able to satisfy their victory conditions and the game was concluded. The final reckoning was a victory for the British. British losses were about 1740, which would normally be about 500-600 dead and the rest wounded/missing.


American losses were twice that and using the same ratio were about 1300 dead and 2640 wounded/missing. Had the British continued storming the Brooklyn Lines the casualties would have been more even, but large numbers of American prisoners would have been taken. The Connecticut militia had held up the British flanking attack long enough for some American units to escape back to Brooklyn when they would otherwise have been caught in the British pincer, and had managed to rout a British battalion in the process. Would Howe have won the war in 1776 had he assaulted the Brooklyn lines? We will never know for sure, but maybe....

Some further random shots of the battle are below. People sometimes accuse "British Grenadier!" of being a slow and frustrating set to use. Certainly disruptions points slow down a brigade's ability to attack, but that's why they are there - you have to think hard and plan your attacks. We took on the largest battle of the war, involving some 60 battalions and reached a conclusion in about 10 hours of play. That ain't bad!