Tuesday 30 December 2008

4th Grenadier Battalion


Another more unusual unit that I had to prepare for the Long Island game was the 4th combined grenadier battalion. This was comprised of highlanders from the 42nd Foot and the 71st Foot. Given the 3 battalions of the latter regiment, the strength of the regiment was some 320 men in 4 companies. Although brigaded historically with the other grenadier battalions, in the Long Island game this unit was detached and added to the main British attack (I forget in which brigade). It was the Perry charging highlander figures that first tweaked my interest in this period; I think the faces have some of the finest expressions that Alan Perry has made. Whilst I know some readers will wince at the full plaid (hi Bob!), you can't deny that a full battalion of charging jocks in highland dress is a stirring sight.


I originally painted a 6-figure base of 42nd grenadiers in 2004 and then added a couple more 4-figure bases a year or so later, another 42nd and one for the 71st. For this unit I rebased them all and generally smartened them up a bit. Noting that I had too many Black Watch and insufficient Fraser's, I repainted the facings of 4 figures to bring them within the 71st. I then had to paint a further 2 figures from scratch. As a result, one base contains the earliest Brits I ever painted for the AWI from 4 years ago and the most recent from October (see the close-ups below)! The difference in painting style is most apparent in the faces - back in 2004 I was using the "black eyeliner" method for painting eyes. I changed from that a year later, as it seemed to me that all my figures looked as if they'd just had a make-up trial at Selfridges. Since then I paint eyes by painting the whole face in the flesh base colour, adding a dark brown wash to pick out the eye sockets, painting white eyeballs and finally adding black pupils and, if appropriate, top eyelids; I think this looks a bit more natural that painting the eyes in black and then adding white etc. Half the figures have a black stripe in their tartan and the others have red - this is an attempt to divide the figures into the first and second battalions of their respective regiments. I have no idea if this is in any way correct - some references I have seen to AWI/government sett tartan state that grenadiers had a red stripe whilst others say they had black.


These chaps did well at the Long Island game, making it into the Brooklyn lines before being thrown out shortly thereafter. For the "British Grenadier!" later Monmouth scenario, which requires two grenadier units of a staggering 32-figures each, this unit will be combined with the 16-figure 3rd Grenadiers. My "1st Grenadiers" is only 24 figures strong (see here), so at some stage I will need to add 8 more figures to it. As I've noted before, you don't need so many grenadiers for most AWI scenarios; one unit of 20-24 figures will suffice for most engagements. Still, you can't quite beat a full battalion of highlanders in full plaid....


16 figures. Painted various times from 2004-October 2008.

Friday 19 December 2008

British Light Infantry (2)


I actually have three battalions of light infantry, two of which are "doubled-up" in both close and skirmish order. I have found with practical gaming experience, however, that one usually uses light infantry as elite "shock" troops and that units tend to remain in close order on the tabletop. This battalion was painted up for the Long Island game as the 3rd battalion in Brigadier General Alexander Leslie's light infantry brigade (which at 1:20 has 3 units of 20, 20 and 16 figures respectively). The 3rd battalion comprised the light infantry companies from the following regiments: 15th, 28th, 33rd, 37th, 46th, 54th and 57th.


The battalion had taken part in Clinton's unsuccessful attack on Charleston. It was commanded by Major The Hon. John Maitland, who seems to have been either from the 71st Foot or the Marines. This in fact makes no difference as both regiments had white facings. So the commanding officer is painted as Maitland in the white facings of whatever regiment he belonged to! The rank and file are in campaign dress of roundabouts and slouch hats rather than Royal Warrant uniform because I thought the former more appropriate to a unit that had just arrived from the Carolinas. Another reason is that this campaign outfit is much quicker to paint....

Many thanks again to Brendan Morrissey for his help with information on this battalion, in particular its commanding officer.

16 figures. Painted October 2008.


Wednesday 10 December 2008

72nd Ligne (1)


I have fallen behind in posting photos of the units I painted in October for the Long Island game, largely because of work but also a lack of decent photos! So whilst I had hoped to maintain chronological integrity in my postings, I am leaping forward to November, leaving behind for later use three lots of pics of AWI stuff I painted in October. After the Long Island game I decided to see how many Perry Napoleonic French, both plastic and metal, I could paint in a month. The result was "34", a little down on what I might reasonably have expected, but enough for just over a battalion's worth. I chose the 72nd Ligne (of Campi's brigade) because I have always been drawn to the Quatre Bras orbat and I wanted battalions that in 1:20 ratio equated to 24 figures (I can't face units of 36 figures, plus skirmishers). So here they are, the second battalion of the 72nd Ligne.


This battalion is a mix of plastic and metal figures. The plastic figures require minimal assembly; in most cases, i.e. for all the attack march poses, you just need to affix the backpack/cartridge case - you need to ensure that you choose the correct ones for figures wearing greatcoats and the flank companies (the former don't require the rolled-up greatcoat, whilst the latter need the short sword). The drummer, officer and skirmishers need more work. The only figure I had difficulty with was the firing voltiguer - it's difficult to get him to fire level, and instead looks as if he's shooting at something in the sky (or a mounted officer?). You can then do head swaps - there are plenty of spare heads with different headgear, battered shakos, "enthusiastic" expressions etc. These include the collars are very easy to affix to the figures, although again you have to ensure that you don't put a greatcoated head on a habit-veste figure etc (I'm sure there is a difference - the greatcoat collars are larger, and this can be seen on the spare heads). The generic nature of the backpack items leads to a couple of anomolies. All the cartridge cases have a pokalem attached - which makes no sense if you use the heads that are wearing pokalems. The cartridge cases do not have any company distinctions, but you can paint those on.


As for the sculpting, there is a slight loss of definition along the sides and the detail is not as crisp as with metals (as you'd expect). I had an undercoat disaster on my first batch of figures, in which I oversprayed and the paint erased much of the detail. But even with the loss of detail suffered as a result I was still pleased with how the figures looked. Occasionally I had to guess where a cross belt should have gone, but generally these figures paint up very well. The faces, in particular, are very well sculpted. The metal figures are pretty easy to spot once you notice the things they have that plastics don't! The mud effect on the trousers was applied largely with pastels, which have the advantage of "running" when varnish is applied, so resulting in quite a pleasing effect.


Aside from the fact that the metal figures have far larger bayonets and are a bit thinner across the front, the only significant uniform difference between the metals and the plastics is that the former have "2nd/3rd battalion" disc pompons on their shakos whilst the latter have "1st battalion" solid pompons. This is my main quandary - do you just paint everything in a solid colour and forget about the battalion distinctions? I suspect that's easier, although you could of course use the plastics for first battalions and metals for other battalions.


But all in all, these are lovely figures. They paint like a dream, cost about 35 pence each and have just the right amount of detail. The speed with which you can paint them means that units can be built up double-quick, which, frankly, is what counts most when building up Napoleon's armies . So why buy anything else? And as for the all-important question of whether I preferred painting the plastic Frenchies to the metal ones.....it's no contest - I preferred the plastics, and I never thought I'd ever say that. The second battalion is progressing nicely, with half completed now. Any readers who despair that I have been seduced by the Dark Side of Naps may like to know that the 9th Foot, in its Saratoga uniform, is well under way as well...


28 figures. Painted November 2008. Flag by GMB.


Tuesday 2 December 2008

Smallwood's Marylanders


The Maryland Battalion was formed in January 1776 as the state's contribution to the Continental Army; it consisted of 3 companies from Baltimore and 6 from Annapolis. It was commanded by William Smallwood (1732-92), a prominent local politician and F&IW veteran who ran a tobacco plantation on the Potomac. In December 1776 a further 6 battalions of Maryland troops were raised and Smallwood's unit was redesignated the 1st Maryland Regiment. The regiment fought at Long Island, White Plains (at which Smallwood was wounded), Brandywine, Germantown, Monmouth, and then campaigned in the south until it was disbanded in 1783. Smallwood ended the war as a Major General, apparently the highest promoted Marylander in the army. He went on to be the fourth governor of Maryland and a senator. The regiment distinguished itself at Long Island in August 1776. Itwas assigned to the brigade of William Alexander, Lord Sterling, along with the Delaware Battalion of John Haslet, and was instrumental in holding up the British advance to allow the rest of the American army to escape.

I painted a "1st Maryland" a few years ago, in blue faced red coats. However, that seems to be the regiment's 1777 uniform and in 1776 Smallwood's men were recorded as wearing tan hunting shirts over buff breeches, with officers in red coats faced buff. Given the unit's distinctive uniform, I decided to paint it up for the Long Island game. The orbat required 24 figures but by using the rank and file I had already painted for the 1st and 2nd North Carolina I only needed a further 8 hunting shirt types and then the command figures in their red faced buff coats. There is an excellent painting of the regiment fighting at Gowanus in the "New York 1776" Osprey Campaign book, and this was the look I wanted to capture. So I added a casualty and used officer figures who look as if they are trying to calm down and reassure the men. The chap with the spontoon is in fact a Foundry British officer. The flag is home made and is based on the family arms of Lord Baltimore. There is evidence that this flag was used for the state from the 1600s until the AWI (see here). There were other options, but this black and yellow lozenge design is very distinctive and certainly stood out on the table! Many thanks to Brendan Morrissey for his help with the uniform and flag details of this unit.

So, given the "1st Maryland" I painted a while ago, these 12 figures represent the first AWI regiment that I have painted twice, in its 1776 and 1777 incarnations. I noted a few posts ago that the range of 25mm figures now available means that you can model reasonably accurate armies for specific years of the war; a Continental Army of 1776 will look rather different to its 1777/78 equivalent and you can, if you want, use a different mix of figures for each army (and if you want a summer 1778 Continental Army you should probably have them all in shirt sleeves!) . So I may have to revisit the notion that I have "enough" American regiments...

12 figures. Painted October 2008.


Monday 24 November 2008

3rd Grenadier Battalion


For some time I had wanted to paint up a second unit of British grenadiers for larger games. At 1:20, a unit of 20 figures will suffice for most engagements in the "British Grenadier!" scenarios (e.g. 16 for Bemis Heights, 20 for Bunker Hill and La Vigie, 14 for Eutaw Springs etc). However, if you want to be able to put on the larger battles with your own resources you need a lot more: Brandywine requires two battalions of 24 figures, Monmouth two of 32 figures each, and Long Island needs all four battalions, 20 figures for each of the 1st and 2nd Battalions and 16 figures for each of the other two. This looks like a huge number of troops, but is only 8 figures more than what you need for Monmouth. For our Long Island game I needed to provide the 1st, 3rd and 4th Battalions. I already had the 1st (see here, which at some stage I will increase from 24 to 32 figures) and the 3rd and 4th, being 16 figures each, would neatly combine to form a second 32-figure unit.


The 3rd Battalion comprised companies from the following regiments: 15th, 28th, 33rd, 37th, 46th, 54th and 57th. These companies are represented by 4 figures for the 15th (i.e. the command stand) and 2 figures for each of the others. Usually one can expect a grenadier battalion to feature lots of different facings colours, but that is not the case here because all the regiments save the 33rd and 54th had (broadly) yellow facings. I differentiated between the various regiments by painting the lace differently and using two shades of yellow for the facings. The 28th and 57th seem to have a darker, more orangey shade of yellow, and for those regiments I used the Foundry "Ochre 4" palette. For the other regiments I used the Foundry "Yellow 2" palette. The figures are all Perry. I chose "charging" poses because they seemed suitable for what I expected the battalion to be getting up to at Long Island and also because the 4th Battalion is similarly posed.


16 figures. Painted October 2008.


Tuesday 18 November 2008

Hessian artillery


These are the two Perry Hesse-Cassel 4-pounders and crews. Apparently Hesse-Cassel's entire artillery corps was sent to America, most of it recruited specifically for the war, and the corps amounted to three companies. According to Mollo, each company consisted of 5 officers, 14 NCOs, 3 drummers and 129 gunners. The artillery corps was engaged throughout the war.

I admit to finding these a bit tricky to paint. The colours of guns caused the first problems - "mid-blue" seemed to be the general consensus as to the wood colour, following the colour used by the Prussian army. I used Foundry's "Deep Blue 20B" as the base, with highlights of "Deep Blue 20C" and "Sky Blue 21A" and "21B". The colour is pretty much what I wanted, although I have no idea if it is correct; but it is certainly a darker blue than the colours I use for British artillery. I painted the breeches of the artillerymen with the standard Foundry "Buff" palette and then realised that the end result did not have that "straw" colour which is appropriate for many Hessian troops. But I found that applying a final highlight of Foundry "Yellow 2C" over the buff colours actually worked quite well - so there is an answer to Hessian "straw" that doesn't even require mixing! The red facings are sometimes described as being more "crimson" than "scarlet", but I used my standard red colours of GW "Red Gore", "Blood Red" and "Blazing Orange."

8 figures and 2 guns. Painted September 2008.


Thursday 13 November 2008

Von Lossberg Fusilier Regiment


Lossberg's regiment arrived in the first division of Hessian troops. Although the regiment suffered particularly from desertion on the journey from America, Lossberger diaries indicate that the troops were relatively eager to teach the colonists a lesson for having rebelled against their rightful King. I have noted before the age of some of the more senior Hessian commanders, but Atwood uses Lossberg to show that whilst the presence of veterans in the ranks no doubt brought much needed experience, it was not just the high command who were "long in the tooth": of the regiment's 35 NCOs, 16 were over forty and 10 over fifty.

The regiment fought at Long Island, White Plains and Fort Washington. It distinguished itself in the attack on Chatterton's Hill at White Plains, earning the admiration of Cornwallis. However, the regiment was stationed in Trenton when Washington attacked at the end of 1776. The survivors of Trenton were placed into the Combined Battalion that was formed of those soldiers who had escaped capture, and which was present at Brandywine, Germantown and Monmouth. In 1780 the regiment was renamed Alt-Lossberg and transferred to Canada.

This regiment should not be confused with Mirbach's regiment, which was renamed Jung-Lossberg's in 1780. I made this mistake and a few weeks before the Long Island gamje realised I had bought the wrong set of GMB flags. Consequently the troops fought under the wrong colours at the Long Island game, but in the photos they have the correct ones (the two flags in the GMB pack are identical for some reason). This is an attractive regiment to model - you have the neat fusilier caps and nice orange facings. Like most Hessian regiments, it appears as a unit of 24 figures in most of the "British Grenadier!" scenarios. I chose charging figures simply because the last unit of fusiliers I painted was in the marching pose. I find it quite difficult to photograph charging figures satisfactorily, so please excuse the rather crappy pics.

24 figures. Painted September 2008. Flags by GMB.


Friday 7 November 2008

Long Island, 27 August 1776


I've found a way around Blogger's tinkering with photo uploads and so finally here is a report of last weekend's "British Grenadier!" mega-game. Many of the photos have already appeared on the web, but there are a couple of new ones . In all, we played 18 turns over some 10 hours. Apologies for the length of this post and feel free to skip to the end to see who won!


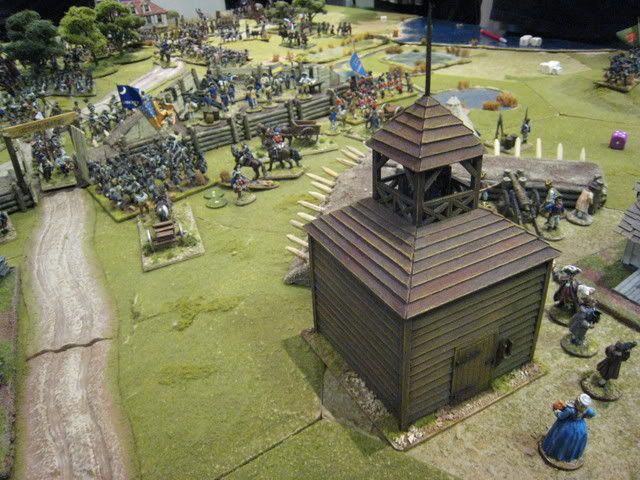
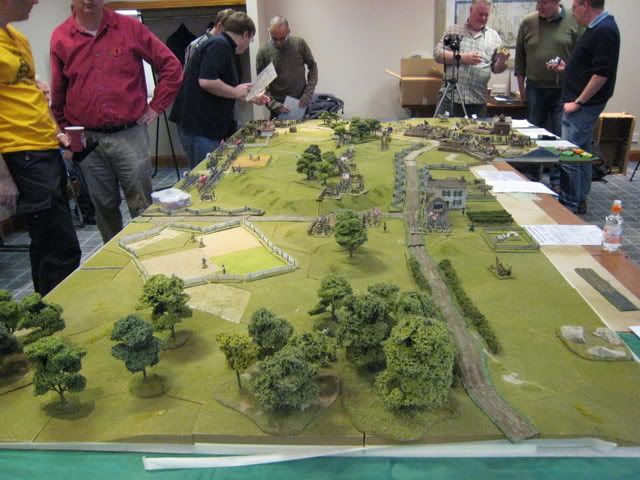
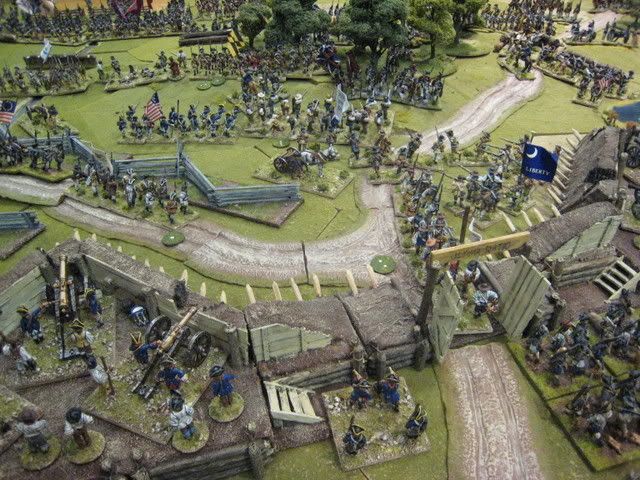
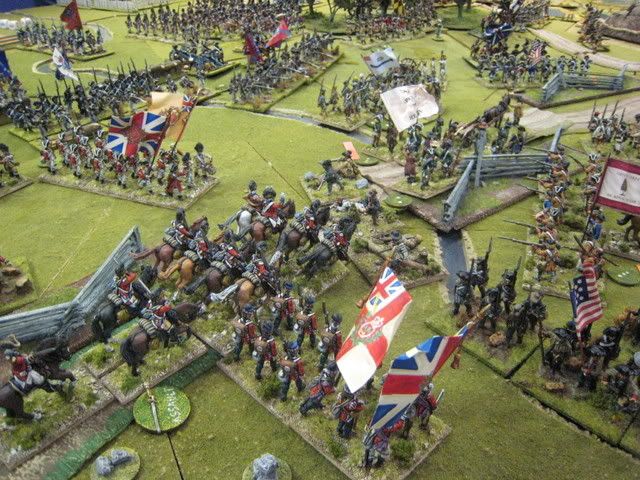
Long Island was the largest battle of the AWI and one of the best chances the British had to inflict upon Washington's army the kind of decisive defeat that may have ended the war. The British attack featured the wide flanking march that General Howe liked to use (cf also at Brandywine the following year), which aimed to catch the Americans in the flank whilst their front was pinned by another assault. The table, shown above at the start of the game, had the Brooklyn Lines at one end, with the left flank of the American position stretching down the Jamaica Road. The marshland of Gowanus Creek can be seen at the far end of the table to the right of the Brooklyn Lines. The lines themselves were specially made for the game by Martin Small. Eclaireur knocked up some nifty painted plasticard sections to represent the coastline and water. Below are a couple of early shots of Clinton's brigades beginning to advance.


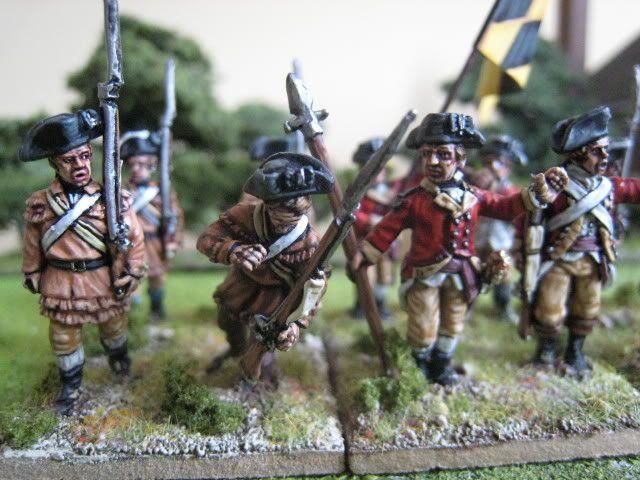
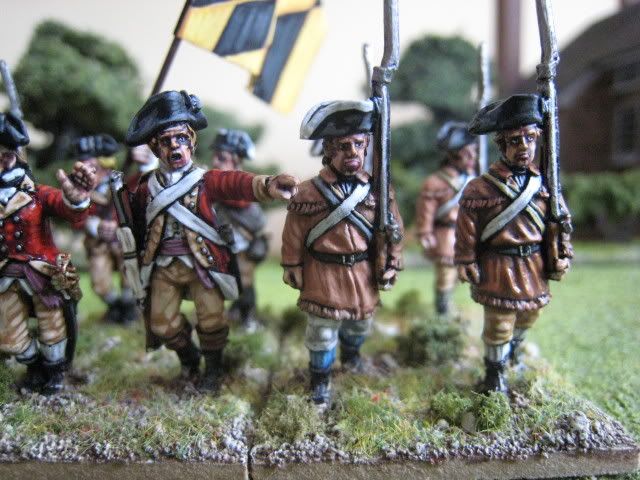
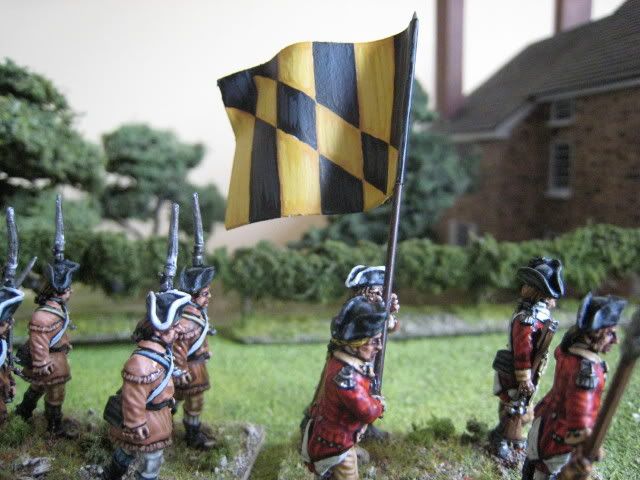
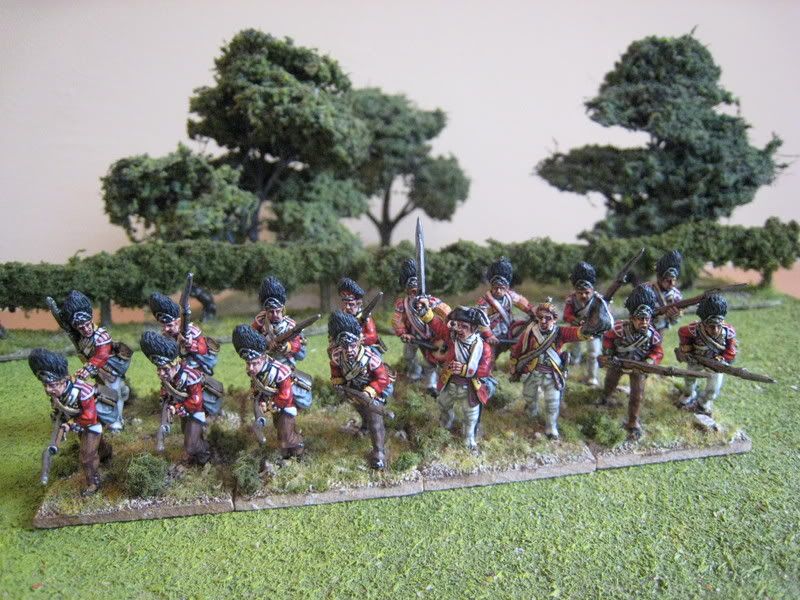
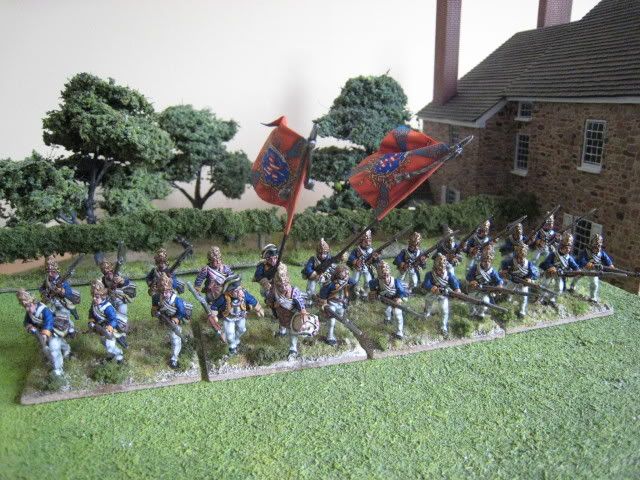
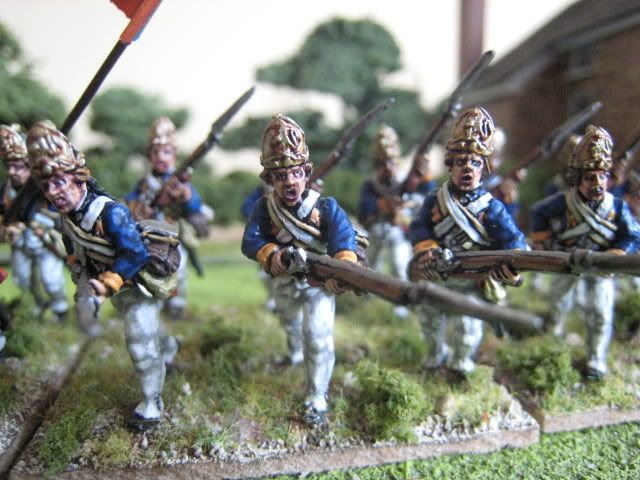
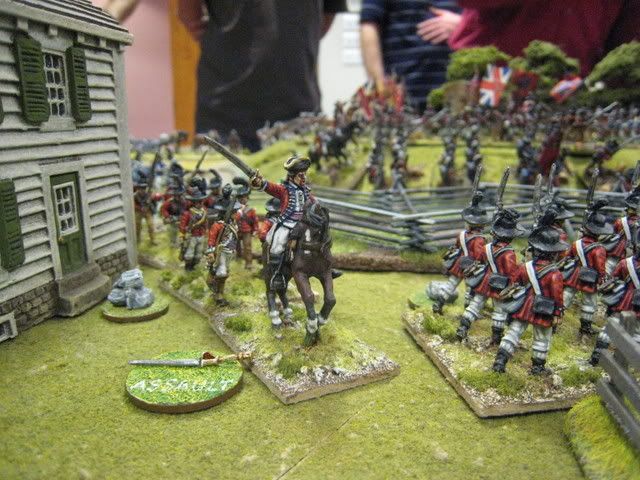
Long Island is a fairly one-sided game as the British, with an overwhelming superiority in both numbers and calibre of troops, can't really lose. Therefore, for the purposes of this scenario, and to make it interesting for the American players, the victory conditions required the British to actually storm the Brooklyn Lines: to win, the British had to have at least 3 battalions in the lines by the end of the game. This assault on the lines themselves is something that Howe refused to do on the day - whether he was doing his "gentleman thing" and giving Washington the chance to surrender, or was wary of the casualties that might arise from a frontal assault given his experience at Bunker Hill the year before, we don't know. But the purpose of this scenario was to see whether the Brits could do it and storm the lines without incurring disproportionate casualties as they did at Bunker Hill. So there were two sectors to the battle - the frontal assault led by the Hessian general von Heister and the flank assault led by Clinton. Von Heister had a brigade of Hessians and two brigades of British line (under the commands of Grant and Agnew). Clinton had much of the army's elite, namely Cornwallis' brigade of the 71st (in 3 battalions) and 33rd, together with light infantry and dragoons under the command of Brigadier Leslie (I took this brigade and the role of Clinton). The American army was a jumble of militia, Continentals and state troops, inferior in quality in theory but full of pluck, as the Brits were to discover.


There were some minor alterations to the historical orbats. The 4th grenadier battalion and one of the reserve brigades were detached from Clinton's command and given to the British centre (a shrewd move as it happened). The Americans had the benefit of additional brigades behind the Brooklyn Lines, which quickly moved out to bolster the lines of defence.


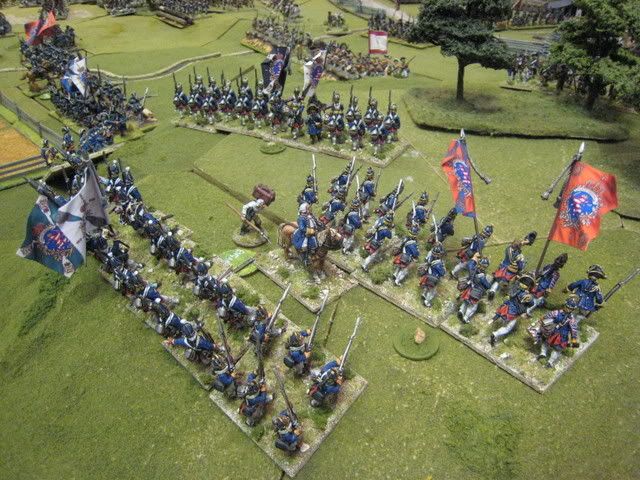
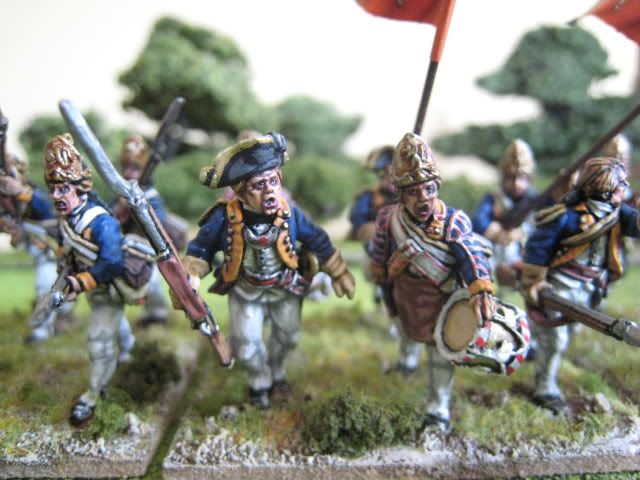
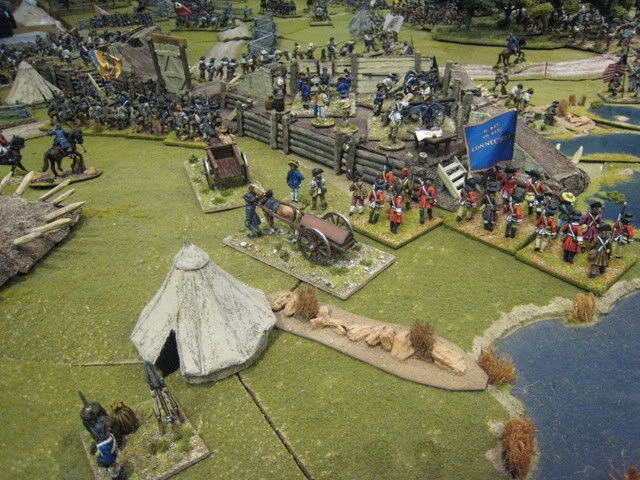
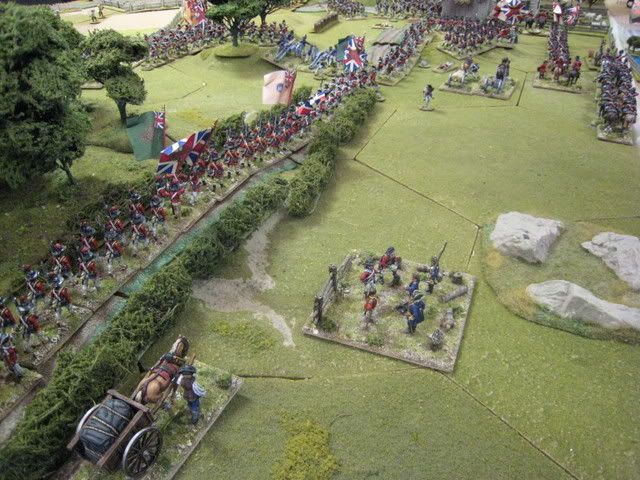
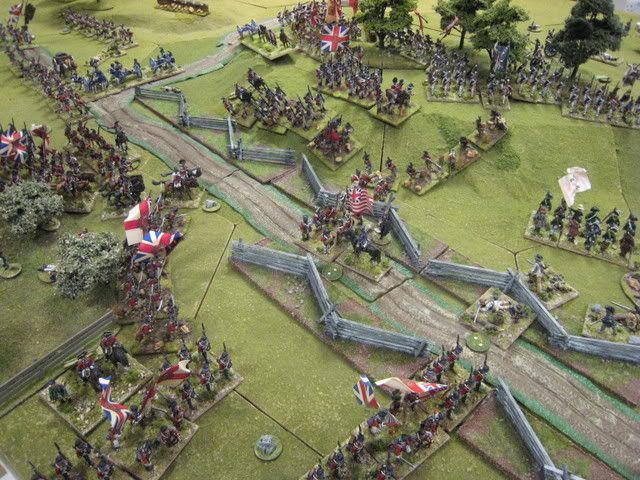
The first encounter was between von Heister's units (commanded by Jerry Taylor) and the American positions directly in front of the Brooklyn lines. The fighting was fierce and Brigadier Grant (Ally Morrison) was captured early on when his horse bolted straight into the Yank lines. The Hessians slowly made ground but took fairly heavy casualties. Meantime, Clinton's flanking attack quickly stalled due to poor dice rolling (i.e. accumulating "disruption points") and general congestion on the one road into Brooklyn. Clinton's reserve units never saw combat for the entire duration of the game, as they remained stuck behind the forward elements and couldn't get themselves into position. Clinton's attack was held up by an incredible rearguard defence by the Connecticut militia, which saw off numerous charges by the 71st and 33rd, one battalion of the former actually routing off the field. Cornwallis himself was hit and spent one turn off the field.


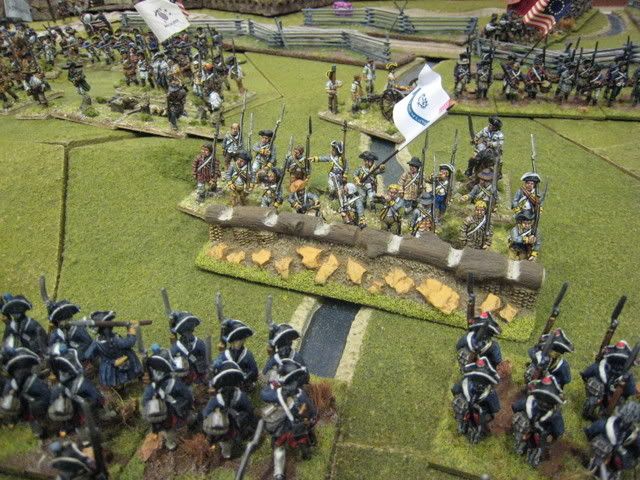
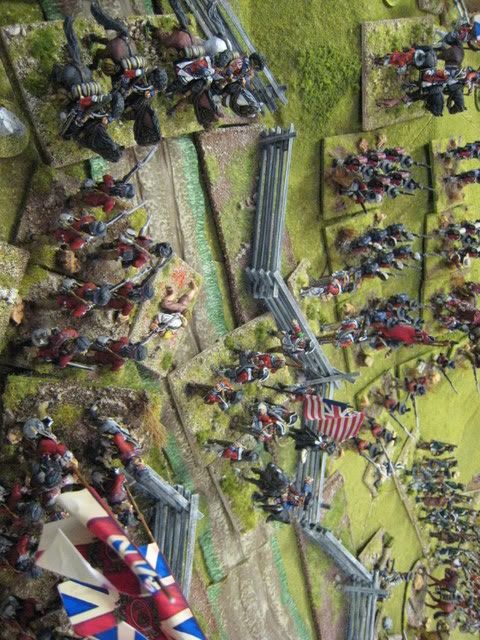
Von Heister's slow success in pushing back the Americans was not matched by Clinton and the American units blocking the road to Brooklyn soon found themselves with Von Heister's lead units to their rear. The situation became very messy and confused and one wonders whether the Americans' success on their left actually put them in a worse position strategically- instead of slowly contracting their line, the Americans found forward units surrounded or receiving fire from different directions. Von Heister was racing his regiments forward as fast and aggressively as he could, with the result that a couple of battalions reached the Brooklyn Lines whilst American units were still engaged in the passes.


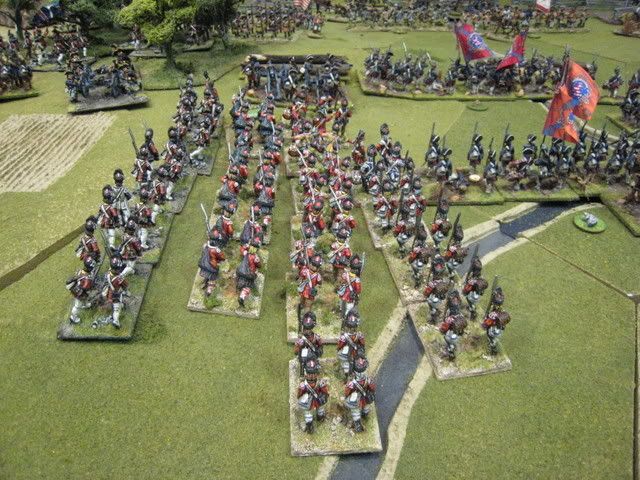
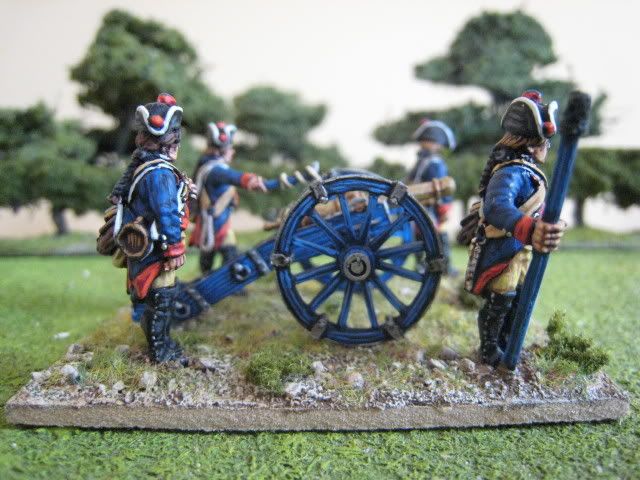
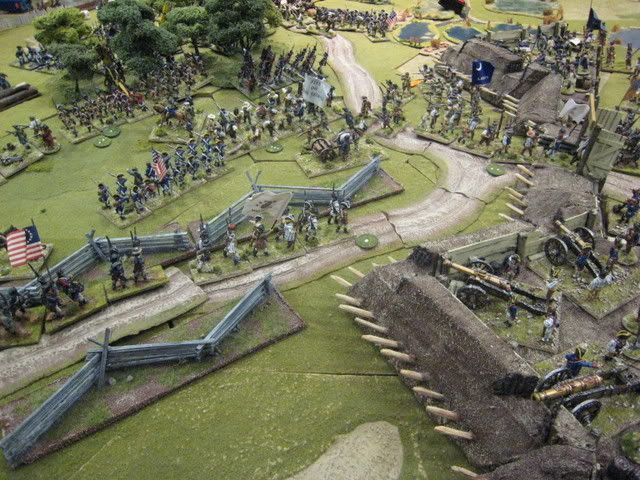
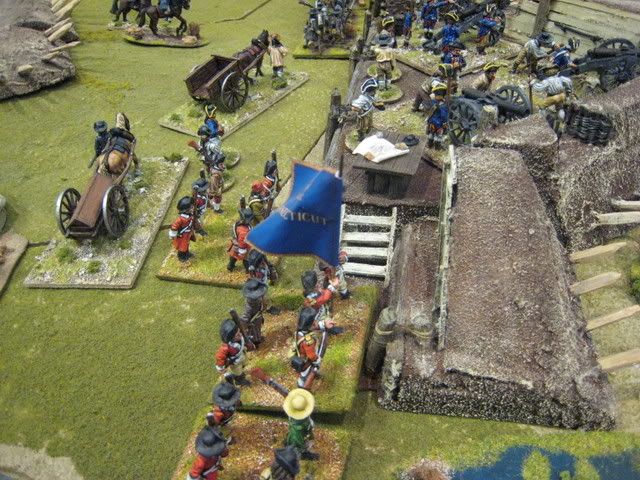
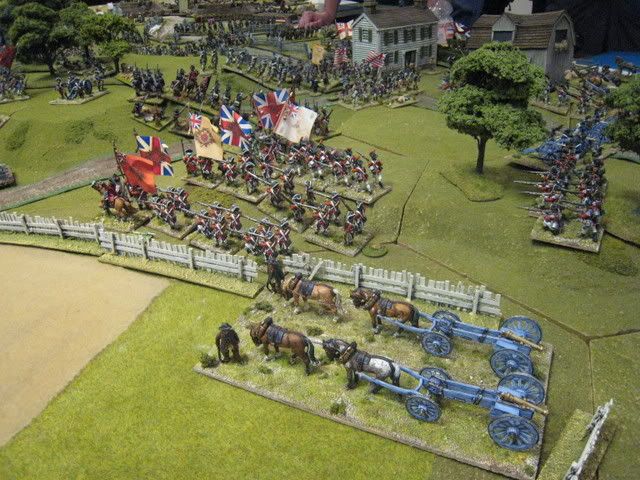
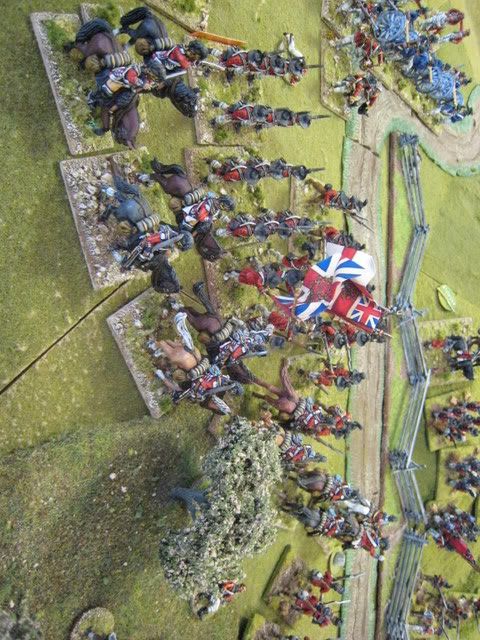
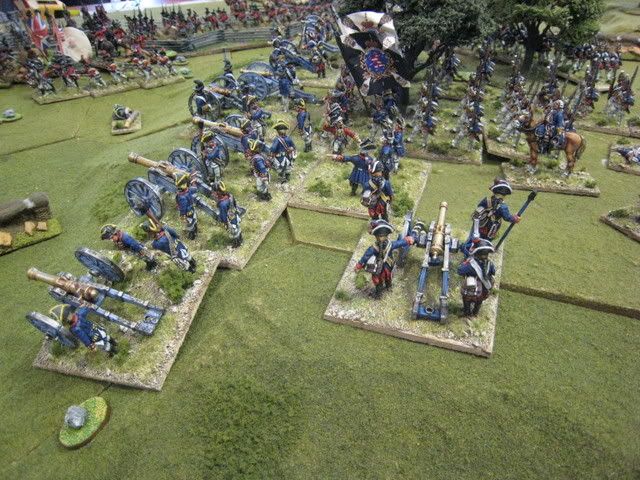
The Connecticut militia continued to withstand attacks by Cornwallis' finest (despite being largely cut off and having seen the rest of its brigade destroyed) . Eventually, in the second turn of the second day, a charge by the 17th Light Dragoons routed them and succeeded where the 71st had failed. This was my only moment of personal glory, when in the post-charge melee Martin Small rolled a double-six for the militia only for me to then roll the same for the 17th (so winning the melee thanks to the modifiers). In true "Scots Greys" style, the dragoons failed to rally and kept on charging into the American units behind the militia, which were already taking flanking fire from the British Guards brigade, now moving into position on the heights overlooking Brooklyn. The 17th charged on and their success resulted in the American brigade in the area collapsing and so freed up the entire left wing for Clinton to finally move forward. By this point, the American units in von Heister's sector were retreating back to the Brooklyn lines, with British regiments hot on their heels. The first British units to assault the lines were quickly thrown out. A second attack by the units on Vaughan's grenadiers brigades was initially more sucessful, but ultimately the grenadiers also had to withdraw. In the meantime, the British had concentrated their artillery into a grand battery that was pumelling the Brooklyn Lines.


By this point, some 8 British battalions were poised to assault the lines and "time" was called. It seemed clear that the British would be able to satisfy their victory conditions and the game was concluded. The final reckoning was a victory for the British. British losses were about 1740, which would normally be about 500-600 dead and the rest wounded/missing.


American losses were twice that and using the same ratio were about 1300 dead and 2640 wounded/missing. Had the British continued storming the Brooklyn Lines the casualties would have been more even, but large numbers of American prisoners would have been taken. The Connecticut militia had held up the British flanking attack long enough for some American units to escape back to Brooklyn when they would otherwise have been caught in the British pincer, and had managed to rout a British battalion in the process. Would Howe have won the war in 1776 had he assaulted the Brooklyn lines? We will never know for sure, but maybe....

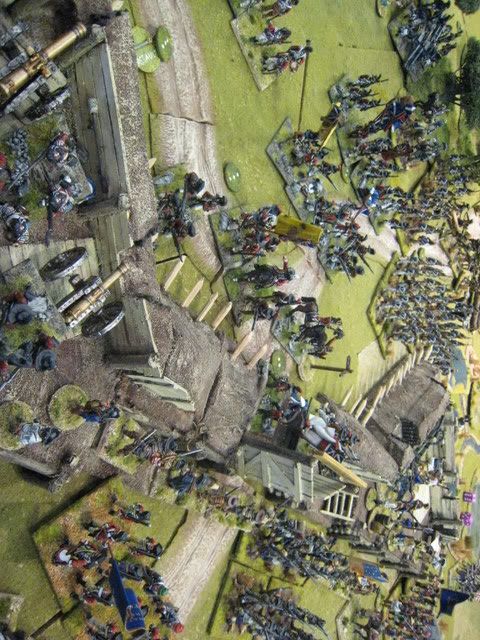
Some further random shots of the battle are below. People sometimes accuse "British Grenadier!" of being a slow and frustrating set to use. Certainly disruptions points slow down a brigade's ability to attack, but that's why they are there - you have to think hard and plan your attacks. We took on the largest battle of the war, involving some 60 battalions and reached a conclusion in about 10 hours of play. That ain't bad!